Category Archives: Organising

Get Organised 2015! – A free printable to organise your sewing

Nina With Freckles - Get Organised 2015 printable pdf 2015-09-16

Oh my, I’m so excited that Wednesday has finally arrived! You know, Organising Wednesday! Because I have a printable to share with you, to help you organise your sewing. I have quite a few projects going on currently, and many of them have deadlines I can’t miss, and so I started pondering what to include in a one-page, monthly overview to cover several of the needs that quilters of Instagram might have.

There are bees and block-of-the month quilts, swaps and challenges or competitions, and gifts and other projects to make! And it all is very fun as long as the house of cards doesn’t tumble down in a glorious kaboom.

Today, I put the final touches to this printable pdf (non-editable), customised to the needs of active quilters, and you can download it – for your personal use – at the end of this post. If you want to tip your friends about it, do direct them to my blog, rather than distribute the pdf itself.

So how do you use it? The idea is to check the box at a particular date, and describe the project by name in the “Project” field. For example, if your swap mosaic is due to be posted on 1 October, tick that box on that date, and use the project name in the corresponding column. 1 October is a milestone, but if you finish the task before, it might come in handy to write the earlier (or later, god forbid… :P) date in the “Done” column.

“Directions” in Bee Quilts means the stuff you need to send your bee friends, when it is your turn to be Queen Bee. Are there other confusing things about the columns? Please ask!

I tend to think that I can recall stuff later, but sometimes when there are many balls to juggle simultaneously, it’s easier not to rely on memory at all, but keep consulting an outside resource. And my printable might be just that.

Testing, testing… The pdf has been viewed in both Adobe Acrobat Reader and Preview on Mac, and printed (A4 paper). Everything works beautifully at my end, and if the fonts give you grief, please install League Gothic and Sacramento.

Printing of pdfs made in Scribus, an open-source software, means you may have to adjust the percentage manually to 100%. I’ve heard of other software allowing the designer to set this number to 100%, but it isn’t an option I have. If your paper size is different from the international standard A4, please test with one page before printing all of them, as you may have to adjust the output a bit.

Feel free to add suggestions to the 2016 printable, which will be available for purchase (nothing overly expensive, but just to keep some of my blogging expenses covered) later this year!

Nina With Freckles - Download button 2015-09-16

The printable pdf is © Nina Martin and intended for personal use only. Please do not distribute the pdf itself, but direct your friends to my blog. Thank you for your understanding and cooperation!

Not organising per se…

Nina With Freckles - Work in progress box 2015-07-15

Not organising per se… But organising all the same. My WIP box, a holy mess. What’s a WIP box? A work-in-progress box of course! One mustn’t assume that all readers are seasoned yet :) Anyway, this WIP box is messy in both the unorganised and overflowing way, and this has to stop.

If you’ve followed me for a while already, you know that I have a special talent for starting projects only to drop them halfway through. As it happens, I’m quite sick of this, because at some point one must finish what one starts, or simply donate the stuff to someone else, who manages to take that final step.

Yesterday I began to rummage through both my project boxes and fabric boxes, since I’m in need of a block organiser. I was contemplating both patterned fabrics and solid white, but might go with the latter. You’ll see soon enough what this block organiser will do, and most likely will want one for yourself, should you like block-of-the-month quilts (BOMs), but back to my boxes.

The finished projects arising from my summer-cleaning spree were a panel curtain for the living room, and a final seam, sewn by hand, of a pin cushion. I believe I’ve mentioned this pin cushion a few times before in my monthly projects…

I also finished another block of a tweaked version of Camille Roskelley’s Sweet Life quilt from the Simply Retro book. Now I have two more blocks to finish (the block centres are already done) before I can do the sashing and finish the quilt top. The quilt project was introduced in December – 2013 – so perhaps it’s time to wrap the thing up? Back then I did the first block, pieced the centres of the three other ones, yet stopped. Why? Well, cutting the remaining background pieces became too boring, so I allowed myself to start piecing the first block, finish it, but leave it at that with the remaining three blocks.

This lack of finishing certain steps, but moving on to sort of greener pastures elsewhere, be it within the same project or to a completely new, different project, is key to messing up flow, the organised project progress. If I don’t finish an entire project, then at least I have to finish a step of said project before moving on.

Please tell me you know what I’m talking about here!? How do you deal with the pull of novelty over the been-there-done-thats?

Organising ironing paraphernalia

Nina With Freckles - Ironing paraphernalia in one-hour basket 2015-06-03

A while ago I made a 1-hour basket and now is the time to show how I put it in use. Back then I mentioned that the intention was to corral all the ironing and pressing paraphernalia, since my sewing studio is the kitchen table, and it is annoying if stuff is floating all around the place. Wouldn’t you say that this lovely basket is much easier to handle compared to all items separately? Yeah, I think so too…

Notice that I’ve emptied and left to dry the water compartment of the iron. Supposedly it isn’t good for the tank to stay full at all times. Also notice that the cord of the iron isn’t only rolled up, but kept in such a state with the help of a cable tie of velcro. Oh my, how this little trick makes handling the iron easier!

At first, the pressing cloth was sailing aimlessly elsewhere, until I had the presence to shove it into this basket, but the water cup of the iron and the starch bottle (make your homemade spray starch with this recipe!) have been a permanent residents from day one.

Do you have your ironing paraphernalia nicely corralled somehow? Have you made a 1-hour basket yet?

Labelling fabrics with numbered binding clips

Nina With Freckles - Labelling fabrics with numbered binder clips 1

Have you ever needed to keep track of your fabric piles in a way that their “chronology” matters? I have! A typical situation is when you want to chain piece columns of patches, or when you’re working on a larger paper-piecing project.

My solution was to write a series of numbers in Scribus, print on white sticker paper, cut, and, um, stick. I used up all the binder clips that I already had, and then needed to purchase a few more, since you can end up using quite a lot of colours in paper piecing, should you happen to catch the FPP bug.

Nina With Freckles - Labelling fabrics with numbered binder clips 2

My basting pins came in an acrylic (I think) box, but in between basting I don’t want to close them unnecessarily, and so they won’t fit into this box anymore. It happens to be the perfect size in all dimensions, however, for this batch of labelled binder clips! For ease of use, I keep them in number order, too. Don’t you just love happy coincidences like that?

How do you label your fabrics? So far I’ve heard of labelled masking tape, labels at the end of safety pins, and labelled ziplock/minigrip bags being used. And clips of a different kind, like Carol Doak does in her Craftsy class; the origins of my binder-clip idea.

Organising my fabric stash – Round 2

NWF Fabric stash organising 1 2015-04-12

In the past, I’ve written about both organising and storing my fabric stash, but in particular how I categorise fabrics has changed a bit, and so here is round 2, an update on the order in which I store them. I’ll also show the bolts I have in use now. The Ikea Kassett boxes are as much a favourite as before, and the collection has grown by a few.

The pencil palette starting with yellow is still how I think of the colours, but I’ve moved pink to go between red and violet rather than orange and pink. The rainbow colours fit into two boxes of the Kassett size, which is one step larger than dvd. In the photo above, there are six boxes of that size, one of the dvd size, and two of the cd size.

Here’s an outline of what this post is about:

  • Organising fabrics:
    • Quilting cottons:
      • Patterned fabrics
      • Solids
      • Some pondering about cut sizes
      • How to handle earmarked fabrics for various projects
      • How to handle scraps
    • Canvas-weight fabrics, cotton-linen blends, double-gauze, fleece, etc. and embroidery fabrics
  • Folding fabrics:
    • Mini bolts
    • Micro bolts

Let’s begin!

Patterned quilting cottons

For some reason, when I think of fabrics and categorising them, I begin from the patterned fabrics, so here goes! In box 1 there are yellow, orange, red, and pink fabrics, whereas box 2 contains violet, dark blue, light blue, turquoise, and green fabrics:

NWF Fabric stash organising 2 - The rainbow 2015-04-12

After the rainbow comes beige and brown (the stack in front only), and then the multi-coloured fabrics:

NWF Fabric stash organising 3 - Beige brown and multicoloured 2015-04-12

If you compare the height of the folded fabrics in beige, brown, and multiple colours to the rainbow fabrics, you will notice that the former aren’t on bolts yet. I’ll talk more about the bolts below.

Next up are the grey and black fabrics:

NWF Fabric stash organising 4 - Grey and black 2015-04-12

Some fabrics have been purchased to be used as collections in projects, even though I usually prefer to make my own mixes and matches. Also, I have a few fat quarters (whereas most of the fabrics above are in fact skinny quarters or half-yard cuts), which all go into a dvd-sized box:

NWF Fabric stash organising 5 - Fat quarters and project bundles 2015-04-12

A quirky thing is that fat quarters certainly are a quarter of a whole unit, but maybe you can see which fat quarters originate in the EU? Up on “top”, the Bonnie and Camille fabrics are metric fat quarters, as is the only batik in my collection down in the right-hand corner. Apart from the end-of-bolt cut navy B&C in the middle, the rest are fat quarters from North America, which are based on the yard. 1 yard is 91.44 cm (or 0.9144 metres), whereas 1 metre is 1,0936133 yards.

The larger project bundles are stored in a Kassett box two steps larger than the dvd-sized box:

NWF Fabric stash organising 6 - Large project bundles 2015-04-12

These are fabrics that I have earmarked but not begun cutting into yet. I do have other boxes for various works in progress, but for these neat stacks of fabrics, the quilt-shop bags used for shipment work beautifully when repurposed like this.

Solid-coloured quilting cottons and miscellaneous other fabrics

My solids are in a sorry state still. I’m drooling whenever I see projects made by others where they clearly have been swimming in the Kona pool. While the current stash doesn’t exceed 20 colours (some solids are elsewhere right now), the intention is to expand this category in the future; hence the spacious conditions of the current fabrics.

The miscellaneous box contains canvas-weight fabrics as well as cotton-linen blends, linens, a Nani Iro double-gauze (which I have no idea of how to use but it’s so pretty…), and a black fleece. In the same living quarters are the embroidery fabrics:

NWF Fabric stash organising 7 - Canvas linen blends etc and Solids 2015-04-12

Lately, I’ve looked at the canvases again, but haven’t yet been able to decide what to use for an embroidery basket.

Scraps of quilting cottons

Scraps are still stored the same way, in two cd-sized boxes, with one for miscellaneous scraps (I like ziplock-/minigrip-type of bags to keep them flat to avoid extra work) and the other for designated projects (for instance the Tokyo Subway Map quilt).

NWF Fabric stash organising 8 - Scrap fabrics 2015-04-12

There’s is a logic to the minigrip bags in the miscellaneous-scraps box, but after making the spider-web blocks for February Queen Bee of Scandibee, Lizzie, it is in a state of holy mess still. Gotta choose one’s battles and all that…

Now that we have looked at how I store my fabrics, excluding the vintage and pre-quilting-me categories, I think it’s time to dig deeper.

How I categorise my patterned quilting cottons – The rainbow-coloured, beige, brown, grey, and black backgrounds

Categorising my patterned quilting cottons makes my heart sing. There’s something about finding similarities and then pondering whether they are strong enough to cause sub-categorising or such to happen, or whether to accept a certain level of lack of “control”. I hesitate to call it lack of control, because I decide what goes where, and nobody can tell me otherwise, roughly put, but disorganisation doesn’t quite fit either, at least not when categories are named loosely. What on earth am I talking about? Let’s see :P

The first concept that I already mentioned in the first article on the topic is tone-on-tone. Hue is “colour” (a pure colour) and so I begin with fabrics, which don’t exhibit anything but either “lighter or darker colours” (forget colour theory for a while, okay, or this gets insane) of the same hue. In the pink case below, there are three fabrics starting from the left that are tone-on-tone fabrics:

NWF Fabric stash organising - How to categorise fabrics - Tone 1 2015-04-12

For some reason, the pink category is abundant in comparison with some other colours. Anyway, tone is hue with some grey added, whereas we get a tint when white is added to the same hue, and, finally, a shade arises when black is mixed into a hue. Like I said, following religiously colour theory would make the task of categorising seriously, humongously nasty, but I shortly had to mention the origin of tone to make sense.

In the categorisation of quilting fabrics, one usually sees tone-on-tone mentioned, and this is how I think of it, too, since I can’t easily determine what the hex values or such of a particular specimen would be. Suffice to say, the pink on the far left looks “dirtier”, more greyish black, compared to the “clearer” pink next to it. I let the eye decide.

Next up in the photo above, we have two fabrics of what I call white-on-tone. Next to them, I have placed tone-on-white fabrics, of which there are also two.

Finally, there’s a merry mix of tone-on-whites and white-on-tones where other colours have been added, too. These “multi-coloured tones” I sort only according to pattern size, which is either small or large, relatively speaking. I see eight small-patterned multi-coloured tones above, whereas the large-patterned category contains only two fabrics. This is entirely subjective, and also depends on what the current fabrics are in my stash. The main point is that there isn’t just the hue alone or hue combined with white in this section.

When we look at my dark-blue fabrics, the situation is this:

NWF Fabric stash organising - How to categorise fabrics - Tone 2 2015-04-12

From left to right, 3 tone-on-tones (you might choose to put the wavy fabric elsewhere but I recall it as entirely blue and that’s what matters), 0 white-on-tone, 1 tone-on-white, 4 small-sized multi-coloured tones, and 2 multi-coloured tones that could be chucked in the larger category but which sort of are small-sized as well. Subjective this is…

This same organising structure I maintain for the whole rainbow as well as beige and brown fabrics, but what about grey fabrics?

NWF Fabric stash organising - How to categorise fabrics - Grey 2015-04-12

Exactly the same. We see: 1 tone-on-tone, 2 white-on-tones, 0 tone-on-whites (the striped fabric includes black), 5 small-patterned multi-coloured tones, and 1 large-patterned multi-coloured tone. You already know the drill regarding black fabrics, but, for good measure, here they are:

NWF Fabric stash organising - How to categorise fabrics - Black 2015-04-12

From left: 3 white-on-tones, 4 tone-on-whites, 3 small-patterned multi-coloured tones, and 1 large-patterned multi-coloured tone.

To summarise:

  1. Tone-on-tone
  2. White-on-tone
  3. Tone-on-white
  4. Small-patterned multi-coloured tone
  5. Large-patterned multi-coloured tone

How I categorise my patterned quilting cottons – The ones with multiple colours on white background

In between brown and grey, I have squeezed what I think of are multi-coloured fabrics. In reality, they are on the greyscale in the sense that their background is white, whereas grey and black fabrics as presented above have those background colours.

The problem arises when I try to define a dominating colour in the pattern on a white background, and where it’s been possible, I’ve thrown these fabrics into categories 4 and 5 above.

If you look at the fabric with the pink birds on a white background earlier, you’ll see the occasional yellow bird, too, but my eyes still read it as a dominantly pink pattern. The flowers next to the birds have other colours than pink, but again, pink dominates the pattern. Then we have lots of yellow squares amongst red and pink squares, and the story goes back to there also being a similar fabric in cool hues – which I recall as mainly blue. Subjective experience once again :) The point is to know where you will spontaneously look for a particular fabric.

Here, however, is a bunch of fabrics, which my brain views as “multi-coloured” in that I recall them as a complete mix of several colours:

NWF Fabric stash organising - How to categorise fabrics - Multicoloured 1 2015-04-12

You might recall the fruits of the first fabric as red or pink, perhaps, but I haven’t been able to decide whether there’s more red or pink, and so I might look for it in both places. In fact, I also view the green leaves as quite striking, so my memory has put them in the mixed category from the beginning. Another example are the bikes, which have yellow baskets and black wheels. My eye recalls all of them, including the pink.

The newest tweaking of this category happened yesterday when I noticed a pattern for the first time. I have themes going on! Above, there are two fruits, five flowers, (on my kitchen table pulled out for this month’s bee blocks are a few animals), and four “stuff”.

Below, there are four scallops, two miscellaneous geometric patterns, three dots, two triangles, and four stripes:

NWF Fabric stash organising - How to categorise fabrics - Multicoloured 2 2015-04-12

It makes me happy to find similarities like this, and while it can be a pain to establish some kind of system, this kind of organising helps me stay motivated to clean up after I’ve finished cutting for a project.

I think I would maintain it even if my sewing space wasn’t my kitchen table, because as you saw earlier, I’m no fan of scrap baskets, but if cuts are large enough to actually be able to “do” something, I’d rather keep them “in the system” still.

This brings me on to the final section of this post, namely how to fold fabrics in a neat way.

Folding fabrics – The mini and micro bolts

Whenever I can make something easier for myself, I try to stick to it. In the case of fabrics, I don’t want to press more often than necessary, and to cut accurately one obviously has to press things beforehand. This is yet another reason for my dislike of scrap baskets, but it wasn’t only until recently that I solved the problem regarding folding cuts smaller than the mini-bolt size.

The mini bolts were introduced in 2013, which suddenly seems like ages ago. The size of these comic backing boards is 171×266 mm, and after investigation it seems like other boards wouldn’t fit my Kassett boxes as well, so pay attention to this if you are interested in creating a similar folding system for yourself.

NWF Fabric stash organising - How to fold fabrics - Mini bolts 2015-04-12

Above is a skinny quarter and a half-yard cut for comparison.

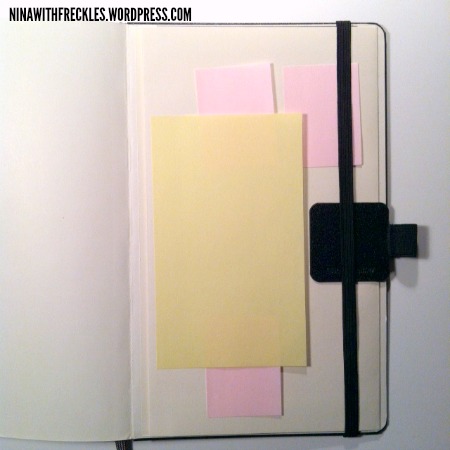
Anyway, mini bolts and too small cuts. Enter micro bolts! They are nothing but free postcards that I had floating around. I’m not sure whether they are acid-free like the comic backing boards, but the intention is short-term use.

NWF Fabric stash organising - How to fold fabrics - Micro bolts 2015-04-12

Yep, they look almost like mini bolts. What you can’t see is that three of these aren’t folded completely around the postcard, but are merely sitting on top of it. Size-wise these micro bolts fit perfectly into the tiny space in the Kassett boxes, like you can see in the very first photo of this post.

For comparison, a micro bolt on top of a mini bolt:

NWF Fabric stash organising - How to fold fabrics - Mini and micro bolts 2015-04-12

See, lots less pressing necessary. And it’s so cute, too!

As usual, if there’s anything at all that you feel like commenting on, or asking perhaps, feel free to do so! How do you feel about organising fabrics, is it something for you? Or do you wish your stash would be more contained, but don’t know where to start?

Ponderings from a kitchen table

NWF Kitchen table sewing studio

You know, things aren’t always optimal in life. My kitchen table is a small and modest thing (see how almost all of it fits into the photograph), but it has four legs and a functional tabletop. It is rectangular, which allows me to keep both cutting mat and sewing machine on it simultaneously. And my pressing station (doesn’t it sound fancy?) is in the corner of the L-shaped kitchen, when I place my pressing board on the countertop in the only available place.

My craft stuff is stored in a walk-in closet and if I want to avoid visual chaos, I need to be extremely mindful of how, when, and what I make. Everything needs to have its own storage box and I can’t work on more than one project at a time unless I want a whole studio apartment upside down.

Not all of us are blessed with houses with extra rooms to make into gorgeous craft rooms. What I have, though, are mad organising skills and I know where I have almost anything you can wish for. My fabrics are in colour order, and tools and notions have their designated spaces. If I want to create something, it has to happen on a total of a few square metres, including storage space, which have multiple functions constantly.

I’d love to have one of those spacious and light-filled rooms with candy-coloured walls and pretty stuff everywhere, but when push comes to shove, I do enjoy the restrictions a great deal right now. It’s almost like a challenge; can I make it work within the narrow limits that are my everyday life currently? Of course I can!

So this evening I’ve sorted through my WIP box and located some projects. There are four on the table currently, which translates to three too many. Next up is the Sound Wave block for the Skill Builder 2013 quilt, because it’s almost completely cut and I need a small project to get started on again. I watched some of the tutorial videos by Alyssa on Youtube and am ready to start sewing tomorrow.

Speaking of Alyssa, there’s yet another small project in my near future. I have this notebook for sketching and today I found out why I bought it a while ago. Alyssa talks about practicing free-motion quilting through doodling and that’s what I’ll use it for. The cover is ugly and in sore need of some fabric to cheer it up, so once my journal cover is done, I’ll be a pro practically :)

Do you have space restrictions of some kind that you need to work with when crafting? I already flaunted those mad organising skills, so please drop a line if you’re in need of inspiration to work a mess out.

My Bullet Journal – A tweaked version to fit GTD

NWF Bullet Journal 1 2014-10-28

While I seriously love getting rid of paper clutter, my attempts at going digital in managing my projects have been a struggle. There are many good aspects to having things syncronised across devices, available as backups, and also editing entered information is a breeze. What has made it less successful is the lack of overview in a sense, as there’s nothing one can flick through like when using a calendar in book format.

I also seem to remember things better when I write them down and an acquaintance in the U.S., who recently went back to university as a mature student, tells me they have banned electronic devices during lectures, because research shows that people learn better when they have to write by hand. I fully believe this, but I also recognise that there can be circumstances, which make paper very inconvenient as a tool, so in the end it can be quite a balance to strike.

A little over a month ago, the balance tipped over to my going back to a paper calendar. Then I recalled an intriguing concept that a friend of mine had found online whilst on her own quest to find (hopefully)  the holy grail of organising, just like I’ve been for so long (hi SK :) ). Enter Bullet Journal.

On my first glance at the system I dismissed it immediately as not being Getting Things Done friendly at all. I also found it problematic that there was no calendar “built-in”, because it isn’t unusual for me to want to enter information on dates far in the future.

In September, however, I looked at it again with a magnifying glass and realised its huge potential. One simply has to tweak it to one’s liking! Which is what I did :) You’ve been warned, there are lots of photos coming up, but it’s such a unique solution that someone used to GTD might benefit from it.

At first I do need to declare my eternal love for Moleskine and it makes my heart sing to use a notebook of theirs again. Oh, and I need to schedule regular photograph takings of the book, should things go down the drain really badly.

Let’s take a look at my Bullet Journal. Its covers are hard and the size is 13 x 21 cm (5 x 8.25 inches). I’ve read some comments online about the paper being thinner now and it seems right. About a decade ago I used a black pen of the kind that I still prefer, but I can’t recall text being as visible on the other side of a page. This is the only minus I have to say.

NWF Bullet Journal 2 2014-10-28

I was contemplating blank pages for a short while, but decided against it. I already have a ruled notebook as a diary, but the space between lines is slightly too large to my taste for this purpose. The grid structure of the squared version is perfect in my opinion.

The Index is a core part of the system, so I’ve kept it but tweaked it. As you can see the months are already plotted out with page numbers. I also don’t like at all the mess of having everything in a list when one might as well group according to context. So far there are months and yearly calendars, but I’ll add my project management contexts later this year once I’ve found my rhythm:

NWF Bullet Journal 3 2014-10-28

I added a second page for Index, because I have a hunch I might need it. The eight limbs of yoga are nice to have at hand:

NWF Bullet Journal 4 2014-10-28

Next up are the yearly calendars for 2014 and 2015 (because this one goes from October 2014 to December 2015). You might recognise them as screenshots made on the iPad. I printed them and think I didn’t have to resize them at all to have them fit on these pages:

NWF Bullet Journal 5 2014-10-28

NWF Bullet Journal 6 2014-10-28

Next up are important dates such as birthdays, anniversaries and other yearly recurring festivities:

NWF Bullet Journal 7 2014-10-28

Here’s the first touch of GTD waltzing in, the Inbox. I’ve dedicated four pages for this purpose and to find the section quickly, I’ve wrapped the corner in washi tape, which suits the black style. The purpose is to have a place whilst on-the-go where I can quickly scribble something without having to think too much nor flick through pages, like the notes and other signifiers of Bullet Journal:

NWF Bullet Journal 8 2014-10-28

I’ve already set up a huge bunch of weekly and monthly recurring day-specific actions (cleaning, bill payment, etc.) in iCal and refuse to type those over and over. Since I want a calendar to record something in advance and to see the overview, I’ve printed a pdf from iCal and resized it to 85% (A4 sized paper). That number I’ve then scribbled in the corner of the folded side (you might see it faintly), because time savers such as that is efficient.

So, fold paper in half, use glue on a strip to avoid wobbly paper wet from stick glue, and attach. This is the start of a monthly section, October in this case:

NWF Bullet Journal 10 2014-10-28

I have yet to print the November calendar and put it in place, but next to it is a grid for habit tracking. When the calendar is fully folded out, the whole dotted grid will be hidden, and I didn’t want to glue the paper onto both sides, because it will not fit perfectly ever, so instead I’m putting the empty page underneath to good use. I’ve listed stuff such as sleep, meditation, nutrition, movement, wellness, and more. Once I’ve done something, I draw a tiny bullet in the corresponding coordinate:

NWF Bullet Journal 11 2014-10-28

Next up is a monthly meal plan (I draw a star next to a date to indicate that something needs to be moved from the freezer to be defrosted in the fridge over night) and a blog planner, both 6×6 squares. It’s great for my perfectionism to show when I mess up, too, so here goes, with a 3-turned-heart in the Notes column:

NWF Bullet Journal 12 2014-10-28

NWF Bullet Journal 13 2014-10-28

Something wasn’t quite right in October, but it finally hit me the other day that I need to define what goes where. Time-specific actions go into the calendar at all times, since I don’t have that many “appointments” currently. Day-specific actions also go in the calendar when I know today that I need to do a particular task next week on Tuesday, because I do follow the Bullet Journal system in how I write day-specific actions on a given day for that particular day, like a traditional “to-do list for today”:

NWF Bullet Journal 9 2014-10-28

The only signifier I use is a circle, which represents a task. I like drawing circles and dislike drawing squares, plus a circle uses less colour to fill.

  • Once it is done, I fill it out to a solid black bullet, or dot if you like.
  • If it is cancelled completely, I don’t want to strike out the task text to make it less readable, so instead I draw an x through the circle.
  • If I postpone, I draw an arrow through the middle of the circle to the right (indicating into the future). Once the task is done, I add the weekday in the margin. You might see FR and LÖ for fredag, Friday, and lördag, Saturday. If it’s a day much later, there will be the full date such as 5.11. for 5 November.
  • In the calendar I sometimes also draw an arrow to the left to indicate that I already did something prior to that day. The same day or date system is in use as when postponed. In particular in bill payment, this might come in handy one day.

To keep track of delegated stuff, Waiting, I’ve decided to type W next to the dot in the margin. The margin is surprisingly powerful and informative visually, so I highly recommend creating one.

During this first month of testing the system, I’ve also found out that my project management section in the back of the notebook needs support on monthly level. In the back, I’ve divided projects according to five life contexts (will talk more in a bit), but not all are active at all times, so now, right after the blog planner, I’ve added for November a Project page where I’ll list in five groups their on-going projects and sub-projects.

I also realised I need to decide what to do about Next Actions that come to mind whenever, but which are in no way day- or time-specific, but simply tasks to do whenever there’s time. This is due to my plotting slightly too often things onto days, when they truly weren’t day-specific. I’ve ended up with postponed signifiers here and there, when they weren’t necessary to get done that day.

An example could be a blog post that I want to write, but if I’m to publish it on Sunday, it doesn’t matter whether I write it on Saturday or Wednesday, prior to scheduling it for Sunday. Next Actions got their own page, too, and that’s where “Write Sunday’s blog post on XYZ topic” will go from now on:

NWF Bullet Journal 14 2014-10-28

Next up, new for November, are the day-specific actions written on the same day in visually traditional Bullet Journal style, like in the thin photo of the margin above. I’ve already written Saturday 1 November with a first circle drawn for whatever task will get done that day:

NWF Bullet Journal 15 2014-10-28

And so it continues until December 2015, after which the “task section” will end with a 2016 calendar looking like the ones for 2014 and 2015. Then the fun begins, my project management section, easily found with a washi tape bookmark like earlier. Simply cut a piece and fold it in the middle to cover equally on both sides of the page. I’ve done the same five more times for the life areas I’ll discuss below.

NWF Bullet Journal 17 2014-10-28

The project management section starts with a list of five goals (private, haven’t entered them yet), but I’ll show the areas, each of which is tied to one of those goals. Personal balance is health and leisure, then there’s school/academia, then home, work, and last but not least family and friends. I’ve listed the SMART criteria for goals  at the bottom and written a great quote: “Saying “yes” to too many things becomes saying “no” to your priorities.”

NWF Bullet Journal 16 2014-10-28

On the page next to the goals is a broad overview of the areas within which I have scope outlined. It’s basically about breaking down something into logical entities within which you might want to make something happen.

The Home area is neutral enough for me to share, so the project areas I’m thinking of are cooking, cleaning (including laundry and textile care), organising (including bureaucratic stuff and such), interior decoration, and fixing stuff (maintenance as well as mending what’s broken). Parties are between Home and Friends & Family in a sense. Some scope/projects are about recurring tasks (weekly, monthly, half-yearly and yearly actions) whereas others are unique, maybe decluttering something permanently or sewing curtains for the living room.

The back cover includes a pocket into which I’ve tucked some pieces of paper, should I have to write something to give to someone else, or a shopping list maybe. That’s another thing I scratched from the signifiers; too messy to scan back and forth when you want a list to hold in your hand whilst walking around the store. Currently I’m still tweaking things a bit so the post-its come in handy when drafting new pages and so on. The pen holder is Leuchtturm1917 and from Amazon for a few pounds:

NWF Bullet Journal 18 2014-10-28

I had a heureka moment the other day when I thought of putting the elastic around the back cover rather than have it flap in every direction and possibly attach to the wrong things whilst in the wild. It’s the simple things, I’m telling you…

And since this is a place for crafts people, a final photograph especially for you to show how I keep an overview of projects with this system. Its home is in the Personal balance / Leisure section and it looks like this:

NWF Bullet Journal 19 2014-10-28

Up in the left corner there’s the category (Fabrics = P&Q or Sewing, Yarn = Embroidery or Knitting, and Other), the Project name, the dates (start and end), and, since there was enough room, also a broken-down division of P&Q into large quilts, small quilts, and small projects.

I have quite a list, but lots are nearly done at this point, so all is good. And apparently Cheryl Arkison has an astronomical number of works-in-progress so all truly is well as long as we enjoy ourselves. Right?

So, thoughts? Comments? Questions? I’m really, really happy about being back at pen and paper, and have been immensely productive ever since the beginning of the month. It’s incredibly satisfying to fill those small circles and I feel much more in control of everything already, even when I’m still finding notes of random scribbles here and there in the apartment.

I’d be glad to help you get started with your own Bullet Journal, if this seems like something for you, and remember, I’ve tweaked it quite a bit due to my GTD background, but what you see in the Youtube video can be just as great for you, as long as it works and is the tool you need.

Or you might tweak it in a completely new way to fit the unique life you lead. I find that while printables are fantastic, they rarely fulfill all my needs, so creating my own system really is the best.

Friendly reminder – Back up your blog

With this post I hereby start a new series, the Friendly reminders with emphasis on friendly. They will arrive at random times whenever I have an exceptionally brilliant thought or something else revolutionary (well, super organised, but that might scare you off).

I’ve been meaning to find out how to back up this blog for a long time and finally remembered to go looking for where and how to do it. Turns out it is very easy, just look!

NWF Backup WordPress 1

NWF Backup WordPress 2

The xml file isn’t large, meaning there’s no image or similar content, so that you need to take care of separately.

Why, how and what should we craft?

It is recommended not to pick more than around five major goals to work on over the course of a year and so I’ve divided my life into five large areas. They are:

  1. Personal balance; health and leisure
  2. Academia
  3. Home
  4. Business
  5. Family and friends

In some parts, those areas are a matter of prioritising – for instance health is the foundation to everything (including being selfish in a healthy way when necessary, to be able to keep giving to others) – whereas putting family and friends in “last” position is by no means how I think in general. The first four areas simply cover my own tasks in project management, while the last includes other people in my actions, so to speak.

For each area I have verbalised a goal, whilst doing my best to fulfill the SMART criteria, and the time span is 2014. A “sub-goal” of personal balance is to work on crafts in a more focussed manner and I’ve decided to share with you my scope related to that goal in future blog posts. Hopefully you will begin to see projects move on from mostly planning to actual execution (including finishing them).

Yesterday I spent some time going through my box of works in progress (it is, um, large) and while I had a few facepalm moments, there were also a couple of screams of glee; after my hiatus I had actively forgotten the true state of said box.

NWF Placemats current status 2014-06-14

Moment of surprise – The tops are already finished

In the evening I was so inspired that I attached the walking foot to my sewing machine and for the first time in my life made two mini-quilt sandwiches. Thanks go to Jacquie Gering for an excellent Craftsy class on using one’s walking foot!

Whenever I surf quiltland I get a huge rush of ideas, but it is very easy to get stuck in that phase without actually moving further. At least that is a weak point of mine, which I have identified as a potential stop light.

Yesterday’s intense learning also showed me that while I might like something on theoretical level, in practice I might feel differently about it. Examining closely the scrappy, improvised mug-rug top and comparing it to the white, very simple back caused a thunderbolt to flash through my brain; I already love designing quilts (have ideas for at least fifty of them already…) but now I have a hunch they will become even more minimalist than expected up until today.

Had I not tackled something new yesterday, I might still have a false idea of my innermost wishes regarding patchwork and quilting. And with that I arrive at the core of this post; honesty and bravery.

I know I’ve mentioned stepping outside of my comfort zone before, but to be honest as well as brave, one has to be focussed in one’s decisions and actions. This means saying no to some things in order to have the time necessary to pursue that focussed path – in alignment with one’s goal for the year or so.

There are so many new techniques to learn and I need clear assignments to avoid getting lost in the jungle of options. In a way it sucks to say no to something, but just think about how much else will get the yes! And how there will be clarity, relief from knowing one is on the right track, doing what one ought to be doing. What truly matters will be put centre stage once and for all.

Do you recognise some of this? Do you have a major goal like I do?

I feel very strongly about being aware of things, listening to oneself, being mindful when doing things, and so on, and I’ve picked up similar vibes from some other corners of the blogosphere.

This angle of blogging is something I’m going to invest a bit more time in from now on, because there’s nothing like being true to oneself. If you don’t have a clue about how to get started, I might have some ideas I can put out there to be helpful. And if you have some brilliant ideas yourself, I’d love to hear them! Learning from each other is always fun.

P.S. Wonder about the post title? I borrowed it from Simon Sinek and his “Start With Why” book, but he presents its nutshell version in a TEDtalk, if you’re in need of inspiration. I don’t like boxing things up too much, but use inspiration wherever I find it, and another example is Sheryl Sandberg’s “Lean In”; I know nothing about economics, but extrapolate merrily – and quite successfully – to my own world in science and medicine.