Tag Archives: organising

My Bullet Journal – A tweaked version to fit GTD

NWF Bullet Journal 1 2014-10-28

While I seriously love getting rid of paper clutter, my attempts at going digital in managing my projects have been a struggle. There are many good aspects to having things syncronised across devices, available as backups, and also editing entered information is a breeze. What has made it less successful is the lack of overview in a sense, as there’s nothing one can flick through like when using a calendar in book format.

I also seem to remember things better when I write them down and an acquaintance in the U.S., who recently went back to university as a mature student, tells me they have banned electronic devices during lectures, because research shows that people learn better when they have to write by hand. I fully believe this, but I also recognise that there can be circumstances, which make paper very inconvenient as a tool, so in the end it can be quite a balance to strike.

A little over a month ago, the balance tipped over to my going back to a paper calendar. Then I recalled an intriguing concept that a friend of mine had found online whilst on her own quest to find (hopefully)  the holy grail of organising, just like I’ve been for so long (hi SK :) ). Enter Bullet Journal.

On my first glance at the system I dismissed it immediately as not being Getting Things Done friendly at all. I also found it problematic that there was no calendar “built-in”, because it isn’t unusual for me to want to enter information on dates far in the future.

In September, however, I looked at it again with a magnifying glass and realised its huge potential. One simply has to tweak it to one’s liking! Which is what I did :) You’ve been warned, there are lots of photos coming up, but it’s such a unique solution that someone used to GTD might benefit from it.

At first I do need to declare my eternal love for Moleskine and it makes my heart sing to use a notebook of theirs again. Oh, and I need to schedule regular photograph takings of the book, should things go down the drain really badly.

Let’s take a look at my Bullet Journal. Its covers are hard and the size is 13 x 21 cm (5 x 8.25 inches). I’ve read some comments online about the paper being thinner now and it seems right. About a decade ago I used a black pen of the kind that I still prefer, but I can’t recall text being as visible on the other side of a page. This is the only minus I have to say.

NWF Bullet Journal 2 2014-10-28

I was contemplating blank pages for a short while, but decided against it. I already have a ruled notebook as a diary, but the space between lines is slightly too large to my taste for this purpose. The grid structure of the squared version is perfect in my opinion.

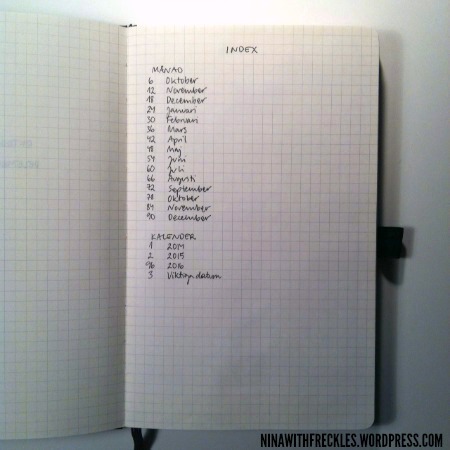
The Index is a core part of the system, so I’ve kept it but tweaked it. As you can see the months are already plotted out with page numbers. I also don’t like at all the mess of having everything in a list when one might as well group according to context. So far there are months and yearly calendars, but I’ll add my project management contexts later this year once I’ve found my rhythm:

NWF Bullet Journal 3 2014-10-28

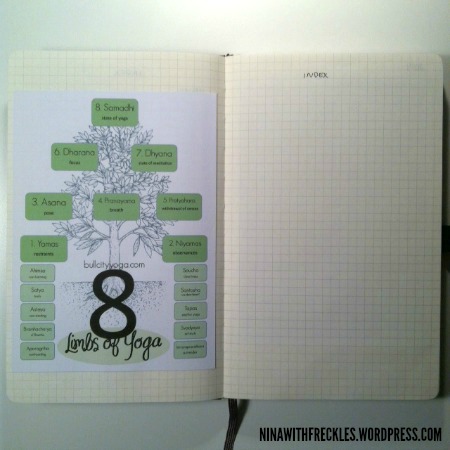
I added a second page for Index, because I have a hunch I might need it. The eight limbs of yoga are nice to have at hand:

NWF Bullet Journal 4 2014-10-28

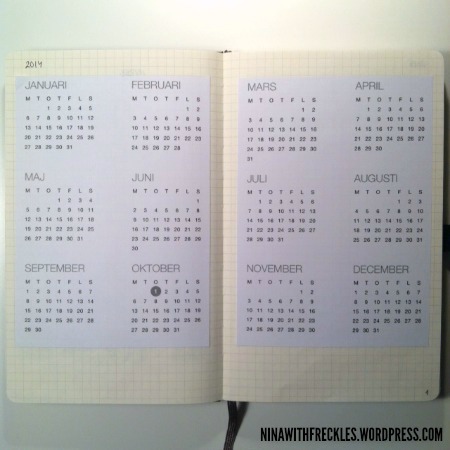
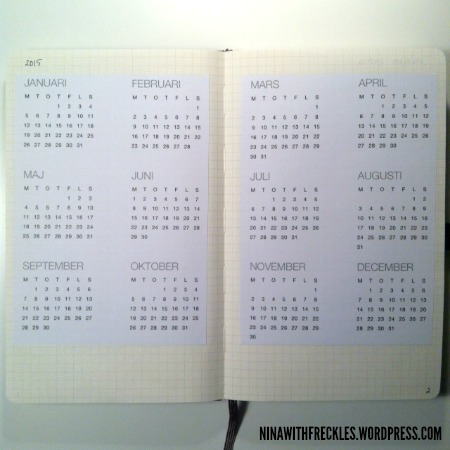
Next up are the yearly calendars for 2014 and 2015 (because this one goes from October 2014 to December 2015). You might recognise them as screenshots made on the iPad. I printed them and think I didn’t have to resize them at all to have them fit on these pages:

NWF Bullet Journal 5 2014-10-28

NWF Bullet Journal 6 2014-10-28

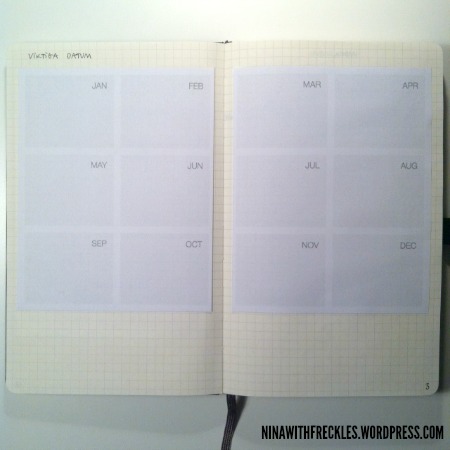
Next up are important dates such as birthdays, anniversaries and other yearly recurring festivities:

NWF Bullet Journal 7 2014-10-28

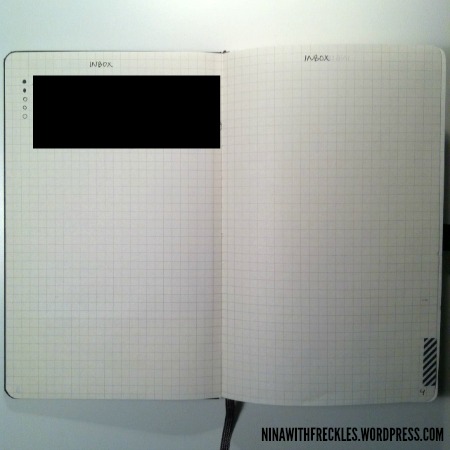
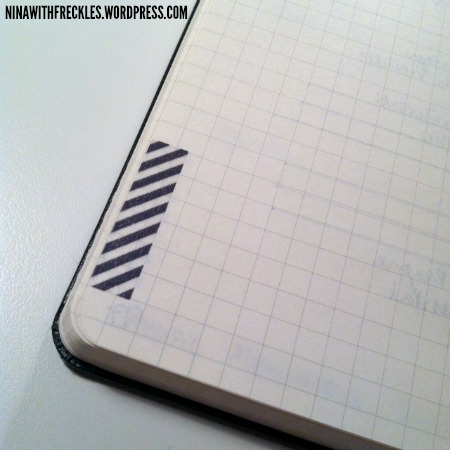
Here’s the first touch of GTD waltzing in, the Inbox. I’ve dedicated four pages for this purpose and to find the section quickly, I’ve wrapped the corner in washi tape, which suits the black style. The purpose is to have a place whilst on-the-go where I can quickly scribble something without having to think too much nor flick through pages, like the notes and other signifiers of Bullet Journal:

NWF Bullet Journal 8 2014-10-28

I’ve already set up a huge bunch of weekly and monthly recurring day-specific actions (cleaning, bill payment, etc.) in iCal and refuse to type those over and over. Since I want a calendar to record something in advance and to see the overview, I’ve printed a pdf from iCal and resized it to 85% (A4 sized paper). That number I’ve then scribbled in the corner of the folded side (you might see it faintly), because time savers such as that is efficient.

So, fold paper in half, use glue on a strip to avoid wobbly paper wet from stick glue, and attach. This is the start of a monthly section, October in this case:

NWF Bullet Journal 10 2014-10-28

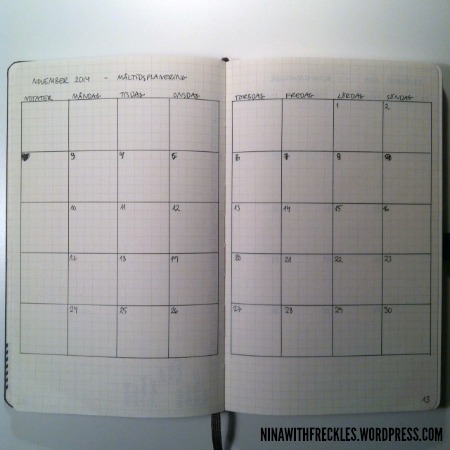
I have yet to print the November calendar and put it in place, but next to it is a grid for habit tracking. When the calendar is fully folded out, the whole dotted grid will be hidden, and I didn’t want to glue the paper onto both sides, because it will not fit perfectly ever, so instead I’m putting the empty page underneath to good use. I’ve listed stuff such as sleep, meditation, nutrition, movement, wellness, and more. Once I’ve done something, I draw a tiny bullet in the corresponding coordinate:

NWF Bullet Journal 11 2014-10-28

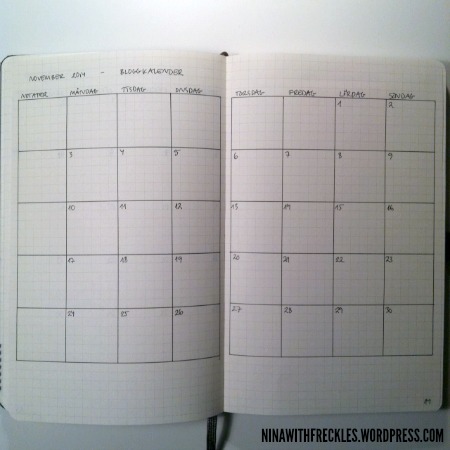
Next up is a monthly meal plan (I draw a star next to a date to indicate that something needs to be moved from the freezer to be defrosted in the fridge over night) and a blog planner, both 6×6 squares. It’s great for my perfectionism to show when I mess up, too, so here goes, with a 3-turned-heart in the Notes column:

NWF Bullet Journal 12 2014-10-28

NWF Bullet Journal 13 2014-10-28

Something wasn’t quite right in October, but it finally hit me the other day that I need to define what goes where. Time-specific actions go into the calendar at all times, since I don’t have that many “appointments” currently. Day-specific actions also go in the calendar when I know today that I need to do a particular task next week on Tuesday, because I do follow the Bullet Journal system in how I write day-specific actions on a given day for that particular day, like a traditional “to-do list for today”:

NWF Bullet Journal 9 2014-10-28

The only signifier I use is a circle, which represents a task. I like drawing circles and dislike drawing squares, plus a circle uses less colour to fill.

  • Once it is done, I fill it out to a solid black bullet, or dot if you like.
  • If it is cancelled completely, I don’t want to strike out the task text to make it less readable, so instead I draw an x through the circle.
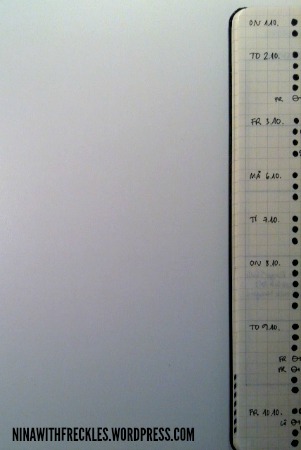
  • If I postpone, I draw an arrow through the middle of the circle to the right (indicating into the future). Once the task is done, I add the weekday in the margin. You might see FR and LÖ for fredag, Friday, and lördag, Saturday. If it’s a day much later, there will be the full date such as 5.11. for 5 November.
  • In the calendar I sometimes also draw an arrow to the left to indicate that I already did something prior to that day. The same day or date system is in use as when postponed. In particular in bill payment, this might come in handy one day.

To keep track of delegated stuff, Waiting, I’ve decided to type W next to the dot in the margin. The margin is surprisingly powerful and informative visually, so I highly recommend creating one.

During this first month of testing the system, I’ve also found out that my project management section in the back of the notebook needs support on monthly level. In the back, I’ve divided projects according to five life contexts (will talk more in a bit), but not all are active at all times, so now, right after the blog planner, I’ve added for November a Project page where I’ll list in five groups their on-going projects and sub-projects.

I also realised I need to decide what to do about Next Actions that come to mind whenever, but which are in no way day- or time-specific, but simply tasks to do whenever there’s time. This is due to my plotting slightly too often things onto days, when they truly weren’t day-specific. I’ve ended up with postponed signifiers here and there, when they weren’t necessary to get done that day.

An example could be a blog post that I want to write, but if I’m to publish it on Sunday, it doesn’t matter whether I write it on Saturday or Wednesday, prior to scheduling it for Sunday. Next Actions got their own page, too, and that’s where “Write Sunday’s blog post on XYZ topic” will go from now on:

NWF Bullet Journal 14 2014-10-28

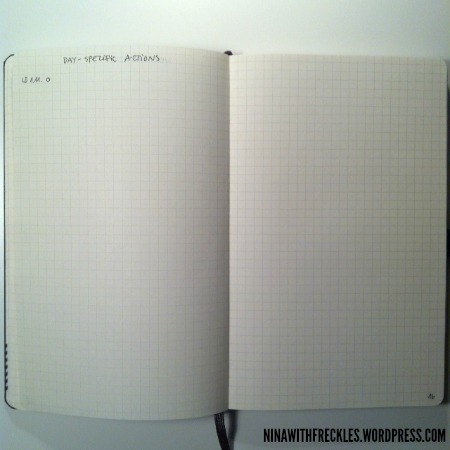
Next up, new for November, are the day-specific actions written on the same day in visually traditional Bullet Journal style, like in the thin photo of the margin above. I’ve already written Saturday 1 November with a first circle drawn for whatever task will get done that day:

NWF Bullet Journal 15 2014-10-28

And so it continues until December 2015, after which the “task section” will end with a 2016 calendar looking like the ones for 2014 and 2015. Then the fun begins, my project management section, easily found with a washi tape bookmark like earlier. Simply cut a piece and fold it in the middle to cover equally on both sides of the page. I’ve done the same five more times for the life areas I’ll discuss below.

NWF Bullet Journal 17 2014-10-28

The project management section starts with a list of five goals (private, haven’t entered them yet), but I’ll show the areas, each of which is tied to one of those goals. Personal balance is health and leisure, then there’s school/academia, then home, work, and last but not least family and friends. I’ve listed the SMART criteria for goals  at the bottom and written a great quote: “Saying “yes” to too many things becomes saying “no” to your priorities.”

NWF Bullet Journal 16 2014-10-28

On the page next to the goals is a broad overview of the areas within which I have scope outlined. It’s basically about breaking down something into logical entities within which you might want to make something happen.

The Home area is neutral enough for me to share, so the project areas I’m thinking of are cooking, cleaning (including laundry and textile care), organising (including bureaucratic stuff and such), interior decoration, and fixing stuff (maintenance as well as mending what’s broken). Parties are between Home and Friends & Family in a sense. Some scope/projects are about recurring tasks (weekly, monthly, half-yearly and yearly actions) whereas others are unique, maybe decluttering something permanently or sewing curtains for the living room.

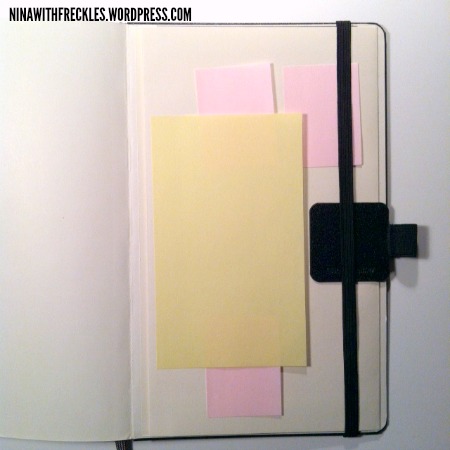
The back cover includes a pocket into which I’ve tucked some pieces of paper, should I have to write something to give to someone else, or a shopping list maybe. That’s another thing I scratched from the signifiers; too messy to scan back and forth when you want a list to hold in your hand whilst walking around the store. Currently I’m still tweaking things a bit so the post-its come in handy when drafting new pages and so on. The pen holder is Leuchtturm1917 and from Amazon for a few pounds:

NWF Bullet Journal 18 2014-10-28

I had a heureka moment the other day when I thought of putting the elastic around the back cover rather than have it flap in every direction and possibly attach to the wrong things whilst in the wild. It’s the simple things, I’m telling you…

And since this is a place for crafts people, a final photograph especially for you to show how I keep an overview of projects with this system. Its home is in the Personal balance / Leisure section and it looks like this:

NWF Bullet Journal 19 2014-10-28

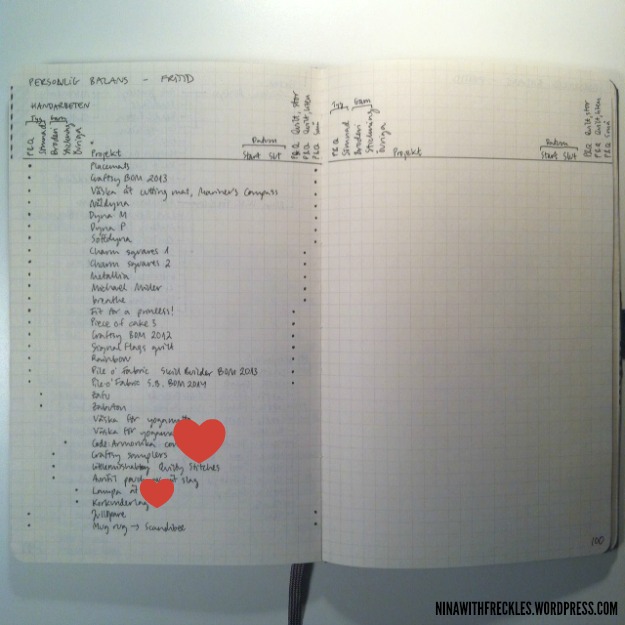
Up in the left corner there’s the category (Fabrics = P&Q or Sewing, Yarn = Embroidery or Knitting, and Other), the Project name, the dates (start and end), and, since there was enough room, also a broken-down division of P&Q into large quilts, small quilts, and small projects.

I have quite a list, but lots are nearly done at this point, so all is good. And apparently Cheryl Arkison has an astronomical number of works-in-progress so all truly is well as long as we enjoy ourselves. Right?

So, thoughts? Comments? Questions? I’m really, really happy about being back at pen and paper, and have been immensely productive ever since the beginning of the month. It’s incredibly satisfying to fill those small circles and I feel much more in control of everything already, even when I’m still finding notes of random scribbles here and there in the apartment.

I’d be glad to help you get started with your own Bullet Journal, if this seems like something for you, and remember, I’ve tweaked it quite a bit due to my GTD background, but what you see in the Youtube video can be just as great for you, as long as it works and is the tool you need.

Or you might tweak it in a completely new way to fit the unique life you lead. I find that while printables are fantastic, they rarely fulfill all my needs, so creating my own system really is the best.

How to fuse pdf documents – Nifty quilt-along trick!

NWF How to fuse pdf documents 2014-12-01

The “Spell it with fabric” blog hop quilt-along by Moda produced a whopping 51 pdf documents to keep track of and it was neither the first nor last pattern spread out over several batches, so here’s a screenshot-heavy tutorial how to fuse them all into a single document in Preview on Mac.

Before we start, in case you’re wondering, I use both Adobe Acrobat Reader and Preview in general, but this fusing function is available only in a paid version of Acrobat, so Preview it is this time! For Windows, there are some inexpensive alternatives to Adobe, but some of them are from questionable sources and since Windows and I aren’t the best of friends, I don’t dare recommend any software. Google some discussion forums or such to see user reviews, if you’re a Windows user.

Start by choosing the two first pdfs to fuse; in Finder, hold down cmd and click on them with the mouse so they get highlighted in blue (I use OSX 10.6.8 so this might look different in other versions). Double click to open in Preview (alternatively right-click to choose this software):

NWF Preview tutorial 1

The file names look odd with the z letters, but I added those to sort how-to etc. down at the bottom of the long list. You’ll see in a bit how the name changes.

As for the screenshot, I use Grab found in Utilities and for some reason when you take screenshots, it’s Grab that is “active”; hence the “inactive” look in Preview.

Since I want the quilt overview first, I grab the “zzzquilt…” file with the mouse and drag it to the top. This is a habit and I encourage you to stick to a consensus; either keep the growing document up on top at all times or down at the bottom the same way. When you’re dealing with multiples of documents, it is easy to lose track a bit. So, once I’ve done the dragging and dropping, this is how it looks:

NWF Preview tutorial 2

Now it’s time for magic! Grab the “zhow…” pdf, drag it and hover on top of “zzzquilt…” until you see a plus sign, then drop “zhow…” onto “zzzquilt…”. You’ll see the uppermost pdf to look like a bound book:

NWF Preview tutorial 3

Hover the mouse above the book to see an arrow, click on it and open the book:

NWF Preview tutorial 4

The “zhow…” pdf has successfully been added to the end of the “zzzquilt…” pdf! To save this change made to the “zzzquilt…” pdf, you can either close the book first (via the arrow) or just click on the uppermost page, then on the keyboard hit cmd+S.

Close the pdfs for now by hitting cmd+W (cmd+Q would close the whole software but that’s unnecessary). I highly recommend learning keyboard shortcuts, as they are so much quicker as well as a much more ergonomic way to work. If you open the drop-down menus on top via File, Edit and so on, you will see the cmd symbol (like a museum sign on maps) and the corresponding letter to hit on the keyboard; this is how I’ve learned them, too.

At this point I change the name of the growing pdf to “Moda – Spell it with fabric”. In Finder, highlight the “zzzquilt…” file and hit enter on the keyboard; you’ll be able to change the name by deleting all of it in one go (delete key) and typing a new name, or if parts of it are okay, just go with the mouse to where you want to start editing. Once the name is how you want it, hit enter again. Done! (If you changed a name by mistake, hit cmd+Z to undo.)

In Finder, highlight the “Moda” pdf as well as the three first pdfs of the alphabet. Double click to open them. This is where there’s a weird glitch going on at least in my version of Preview; some but not all chosen pdfs open in the same window. To remedy that, I hit cmd+W twice to close both windows, then double click again on the highlighted pdfs in Finder. Now I see both “Moda” and the A, B, and C pdfs in the side drawer of Preview.

We are ready to continue fusing pdfs. (I don’t know how to take videos of my screen, so instead you’ll have to see these awful photos of the screen, very sorry about that.)

If you try to drag A to the closed “Moda” book, nothing will happen. Open “Moda” first to see both its pages, then drag A and drop into the book (you can see the shadow of A whilst I’m hovering it in the air before dropping):

NWF Preview tutorial 5

Notice the blue bar in the photo. When you’re not just moving around the A pdf, but are actually dropping it into the book, you’ll see a box appear:

NWF Preview tutorial 6

Yup, this means you can move the pdf pages around however you see fit; another nifty trick! Since you fused the letter A to “Moda”, do the same with “B”:

NWF Preview tutorial 7

The letter “C” is next and then it looks like this:

NWF Preview tutorial 8

Don’t worry about the weird page numbering, it will sort itself properly once you’ve saved “Moda”, close it and open again.

Save “Moda” (cmd+S) and close it (cmd+W). If you’re curious like I am, you check that all the pages are indeed fused, before deleting any files.

Keep adding all the letters like we’ve done with A, B, and C here.

* * * EDIT STARTS * * *

After I had finished this tutorial, I concluded there happened a brain fart. Sorry, guys, you don’t have to add each letter individually, but if you open say five at once, you can select all those and drag the batch onto “Moda”. I actually learned this myself just now, so lots of good stuff came out of writing this tutorial. Carry on :)

* * * EDIT ENDS * * *

Remember the possible glitch of not all pdfs appearing in the same window, so close and re-open if necessary. And double check just like measuring twice, cutting once, before deleting any pdfs. Once you’re done with Z and ready to add the number pdf, you can calculate to 26 letters + 2 first how-to pages, if you’re sticking to my order:

NWF Preview tutorial 9

That odd page number thingy earlier with lots of pages 1 after one another? Well, that’s because the fused pdfs contained only one page each. The number pdf contains 10 individual pages and hence it will look different once added after the Z page:

NWF Preview tutorial 10

Now “Moda” should consist of 38 pages and then the punctuations brings you up on 50. The last pdf left to fuse is the page containing the 8” blocks:

NWF Preview tutorial 11

The final page count is 51 and you’re done! See that page count appear also up on top next to the file name? That’s another place where you can double check the total number of pages without scrolling all the way down to page 51 in the “Moda” book itself. Save and close your nice new pdf e-book!

NWF Preview tutorial 12

You can obviously do this to any pdfs, not just those related to quilting (haha, I’m so funny), but if there are image files involved such as jpg, you’ll need to tweak the process a bit. I’ll post a tutorial at some point and will include ideas for how you can organise your computer better.

As always, please post comments and questions, if there’s something I didn’t think to include or just wrote in a foggy way. Hope you can use this to locate your patterns quicker!

Storing my fabric stash and other sewing gear

Fabric storage - Ikea Kassett 1A couple of days ago I wrote about organising the fabric stash and today I’ll show my way of storing them. My angle is the small space, because I live in a small flat (37.5 sqm or 404 sqf) and sewing isn’t a very good hobby to have, unless one keeps all the stuff fairly organised as well as easy to move between working area and storage area.

I have a walk-in closet with wall-mounted shelving and while it used to be a space for clothing and other textiles mainly, I’m currently doing a bit of a puzzle with the aim to get all clothing out, then corral other objects there, sewing-related items included.

The Kassett boxes made by Ikea are excellent in my opinion, since they come in various sizes with uniform looks (calms the visual part down a bit) and they don’t break the bank. The reason for my pushing this line is simple; we don’t have many options here in Finland, but it’s sort of take it or leave it in many cases. I also don’t happen to appreciate plastic all over the place, so good labelling is key when you miss the see-through aspect.

Two stacks of fabric fit into the Kassett box pictured below. There is space between them still for easy lifting in and out.

Fabric storage - Ikea Kassett 2

Kassett size 27x35x18 cm, one step larger than the dvd box

Fabric storage - Ikea Kassett 3

From above – Folded fabric is the size of a three times folded quarter yard, about 9”x6”

That little space between the two stacks is really important to have! In theory, the folded quarter yard could just fit into the cd-sized Kassett, but your hands would have to squeeze in to lift the stack and you don’t have any chance to quickly scan the pile. On the other hand, if you fold like this and place the pile in the dvd-sized box, you pay for storage of thin air. So the one step larger box is perfect and this is what will fit into it when the stacks go up to an inch below the lid:

Fabric storage - Ikea Kassett 4

These will fit into the second-largest Kassett

As for weight, I wouldn’t want to handle boxes larger than the ones above, because fabric is heavy. I don’t stop at sewing stuff, but store lots of other things in the Kassett boxes, and my philosophy is “like with like, customize box size according to amount of contents (more and smaller boxes over fewer and larger)”. My handwriting isn’t too bad, but after having tried to read with ease texts on the uppermost shelves, I’ve concluded that computer-generated text is preferable.

While the labels are easy enough to rewrite, I prefer the thought of a dynamic stash, which has produced the following labels for quilt-weight fabrics so far: Coloured background 1, Coloured background 2, Black-and-white background 1, and Black-and-white background 2. They live in the box size pictured above, as do Solids.

I don’t have many solid fabrics yet, but I’m thinking the amount could increase whereas some of the other categories could shrink or at least not expand much, so the solids got their own larger box too. In dvd-sized Kassett boxes I keep the following: Canvas, Linen and blends, and Other fibres (double-gauze etc.). A couple of cd-sized Kassetts house these: Scraps, and Scraps for projects (currently Tokyo and Slices scraps). I like storing my scraps flat, because I don’t want to press them again nor do I like the space that the fluffy shapes demand.

To be honest, I won’t mention a couple of boxes of fabrics inherited from my grandmother, because I still haven’t truly dealt with them other than refold after having chucked out some really odd leftover pieces produced when cutting clothing etc. Let’s pretend they don’t exist for now.

What’s left to mention are the two large under-bed-sized boxes of another brand. They look almost like the Kassett boxes (which pleases me greatly… *rolls her eyes at herself*) and due to their larger footprint they are the perfect home for works in progress.

Buttons, bias tape, threads, you name it; it all has been sorted according to context and put in the dvd-sized boxes. It is super helpful not to stack the contents vertically, but once a small box is full, you create another one. In a small home, it also means that you bring out only a couple of small boxes rather than some very difficult to maneuvre storage solutions.

And the labels themselves? I’ve found the Apli labels, which come in 20 labels per A5-sized sheet (two columns) to be perfect here, because they cover the area of the label cardstock completely in vertical direction. All I have to do after printing is to cut off the overhang in the horizontal direction. The method of sticking the label onto the cardstock is very high-tech; hardcore eyeballing.

The typeface I use is League Gothic and here most labels are written in size 20 with 2% wider tracking (not kerning but you can read about both here). If there is lots of text, I resize to 19 and/or decrease tracking to 1 or 0. Normally League Gothic reads well but on the higher shelves it’s easier to have a bit of space between the letters. I prefer all caps for higher readibility, as well. If you want to download it, go to FontSquirrel where they have a fantastic selection of free typefaces that come with commercial-use licences. If you don’t have the appropriate software, my favourite is Scribus.

The Apli labels are really good everywhere in the household, by the way, and I print return-to-sender stickers, handwrite on kitchen jars (they come off again like a charm when washing!), and all sorts of things.

If you have questions on any of these topics, feel free to ask in the comments and I’ll do my best to answer!

_ _ _ _ _ _ _ _ _ _ _ _ _ _ _ _ _ _ _ _ _ _ _ _ _ _ _ _ _ _ _ _ _ _ _ _ _ _ _ _ _ _ _ _ _ _

The Organise Your Sewing Room series consist of these articles so far:

Organising my fabric stash

It was time to reorganise my fabrics and after having read articles in the superb series Art of Choosing by Jeni of In Color Order, I realised my stash structure was close to how I needed it to be, with only a few tweaks necessary to make. I spent some time putting back fabrics used in recent projects, shuffling within colours and looking closely at prints. It was great fun and I want to share my decision-making process, first through an explanation and then some photos.

Jeni uses the rainbow as her foundation, but originally I got into this from another direction, the artist’s pencils. Both Caran D’Ache and Faber Castell, which happen to sit (currently unused) in my crafting stuff, start from yellow, so that’s what I chose back in the day. I’m so set in the pencil order that I haven’t had any success when trying to switch to the rainbow order.

The order of colours I’ve chosen is this: yellow, orange, pink, red, violet, blue, turquoise, green, brown and the greyscale. I know some prefer pink between red and violet, and brown could go close to orange-reds, but since neither brown nor greyscales are in the rainbow I’ve put these at the end of the colour line. The greyscale starts with white and ends with black in my stash.

I want things neat, categorised and contextualised if possible. Blog articles are a great example in that you can add both categories and tags to them, and while tags are fine when you have lots of information to dig through, the very rigid categories are of fantastic assistance in this case; you want one context to be applied to a single fabric. (Or you could choose not to organise in any way, but simply keep stacks in a glorious mix. The latter isn’t for me though, so here we are.)

Jeni’s way of presenting fabrics with prints was the heureka moment for me. In Recognizing a Fabric’s Overall Color, she discusses with good examples the different looks that a fabric can have: 1. tone-on-tone fabric, 2. color+white fabric, 3. fabric with small accents, 4. fabrics with large accents, and 5. multicoloured fabrics.

I had tried too complex a way to sort – by background tone – and something was missing, so to view fabrics in this five-category way helped me learn more about the prints and bring order to the multicoloured as well as the greyscale fabrics, which were in a holy mess still. In Organizing Your Stash by Color, Jeni combines the tone-on-tone and color+white fabrics into one group, which is helpful. Now I use the five-category model to understand my stash, but the physical organising combines categories 1. and 2.

How I organise my fabrics with prints:

  • Coloured background
    • In artist’s pencil order
      • Tone-on-tone and color+white fabrics
      • Fabrics with small accents
      • Fabrics with large accents
  • Greyscale background
    • White background
      • Accent colours in artist’s pencil order
        • One accent colour
        • Several accent colours
      • Multicoloured accents
      • White+grey fabrics
      • White+black fabrics
    • Grey background
      • Tone-on-tone and grey+white fabrics
      • Fabrics with small accents
      • Fabrics with large accents
    • Black background
      • Tone-on-tone and black+white fabrics
      • Fabrics with small accents
      • Fabrics with large accents

The “troublesome multicoloured fabrics” in my stash are in fact not difficult at all. I’ve discovered that once I’ve identified a particular background colour for a fabric with multiple colours, the accent size will be enough for further classifying this fabric.

Fabrics with white background are the exception, as I have quite a lot of these. To make things slightly easier, when I’ve identified one accent colour as the main one, I place the fabric according to artist’s pencil order, rather than among the multicoloured accents, of which there are many enough to be in no order at all. To decrease the amount of sub-sub-sub-categories, the accent size of patterns on white background is ignored.

Now it’s time for the photos! I’ll use pink as an example.

Stash organising 1

Fabrics with pink background and fabrics with pink pattern on white background

Stash organising 2

Fabrics with pink background, tone-on-tone and pink+white up on top

Stash organising 3

Fabrics with pink background, small accents up on top

Stash organising 4

Fabrics with pink background and large accents

Stash organising 5

Fabrics with pink pattern on white background, pink-only accents up on top

Stash organising 6

Fabrics with pink pattern on white background, multicoloured accents that are mainly pink

Stash organising 7

Fabrics with white background, multicoloured accents – No main accent colour is identifiable

Stash organising 8

Fabrics with black pattern on white background

Stash organising 9

Fabrics with grey background – Tone-on-tone and grey+white up on top, small and large accents at the bottom, and question marks in the middle (possibly tone-on-tone or small accents so they are in between the two)

Stash organising 10

Fabrics with black background – Black+white up on top (which is where tone-on-tone would be too), small accents in the middle, large accents on the bottom

All the other colours work the same way as pink. Currently I don’t have any fabrics with grey accents on white background, but they’d be squeezed in between the multicoloured ones and the black ones on white background.

I’m a pretty organised person, but constant maintenance of this system will be too much, so the structure is one that I’ll keep in the back of my head when making decisions in the future on which fabrics to purchase (what type do I already have lots of, what is on the other hand missing). It’s also been great to finally develop a way of classifying fabrics out of a colour, texture and pattern point of view – because the quilt is the end product and that’s where the results will be visible. When chaos has reached an uncomfortable level, I’ll apply this structure once more when reorganising, but in between I prefer less rigid rules.

Next organising article will be on stash storage! (Yes, with photos once again!)

Edited to add: You can find it here now.

_ _ _ _ _ _ _ _ _ _ _ _ _ _ _ _ _ _ _ _ _ _ _ _ _ _ _ _ _ _ _ _ _ _ _ _ _ _ _ _ _ _ _ _ _ _ _ _ _ _ _ _ _ _ _ _ _ _ _ _

This is the first article in the Organise Your Sewing Room series.

Tokyo Subway Map Quilt – Cutting begins

Cutting fabrics for my Tokyo Subway Map Quilt has begun! The significant part of cutting in my opinion isn’t knowing how to produce 2” x 2” squares nor is it the matching of fabrics, but what can make it or break it as far as motivation goes is (lack of) organisation (and you want motivation to continue through piecing a quilt top consisting of 1600 squares). This might be obsolete, if you were to cut right before piecing, but I foresee a Tokyo quilt at such a stage in 2014 at the earliest.

The scrap pieces I chose a while ago were sitting uncut in my sewing room aka kitchen table, because I wanted to come up with a system of keeping cut squares tidy and without fraying around the edges. I’ve created a simple bag system and today I’ve written some even simpler notes on halved postcards, which will double as support inside the plastic bags.

Tokyo Subway Map Quilt - Organising squares

You might be wondering why I’m writing the labels in English? It is what my brain produces spontaneously when learning from a source other than my mother tongue and all learning in my case happens either online, be it various English-speaking blogs or Craftsy, or books written by mainly American quilters and sewers. The same happens in academia and in some cases the vocabulary doesn’t even exist in Swedish/Finnish, so English it is. I like a global audience anyway, seeing as our planet has shrunk after the internet was born.

After a bit of rambling, here’s the next photo of my very high-tech postcards:

Tokyo Subway Map Quilt - Keeping track of square count

The lighting isn’t too good today, since the sun refuses to show itself here. Half a postcard is of optimal size once it’s inside the bag, as you can see. Place it behind the fabrics with the text facing the other side of the bag for easy reading and no smearing of text onto the squares.

Tokyo Subway Map Quilt - Counting squares

It’s not the prettiest of solutions, but it works. And it is a great way to declutter those “keepsake” free postcards that were so “cute” once (decades or even a few years ago).

To celebrate this Tokyo lift-off I’ve created a square counter in the side column of the blog (I’m silly like this). It’s on minus 56 already with only 1544 to go!