CROCHETED BOWLS OF THE DELICIOUS T-SHIRT YARN

Recall my Ridiculously Delicious T-Shirt Yarn? A few weeks ago I finally got around to buying a 10-millimetre crochet hook by Addi, and since I had no energy left in my body for sitting at the sewing machine, I ended up in a horizontal state on my sofa. Invited to join were my iPad for searching yarn-bowl patterns, the new fancy hook with gold glitter in the plastic, and a box of all the yarn balls of course. I ended up using this tutorial by NimiDesign in various ways.

Nina With Freckles - T-shirt yarn bowls 1 2016-03-15

My first project was a small bowl in white, medium green, and dark green. It used up yarn cut (check out advice in my earlier blog post) from one normal white t-shirt, an extra long white t-shirt, a medium green one, and one row of the dark green. The intended recipient, my sister, already uses it in her entryway for corralling dog paraphernalia, since Miss Puppy is rather teeny tiny still, and needs to go out quite often.

This roughly corresponds to four t-shirts, which took me by complete surprise. While a perk is that such thick yarn is quickly worked, it also means I will have to be mindful how I choose to use my balls of yarn in the future, because the supply is limited after several rounds of purging the wardrobe.

Next up was a wide, open bowl in white and a dark mustardy yellow, also for sister dearest. I never knew terrorbabies aka adorable puppies come with so much stuff, but yup, it can invade a space quickly as lightning.

Nina With Freckles - T-shirt yarn bowls 2 2016-03-15

I used three t-shirt yarns for that project, but while there was one end project shown here, I had frogged it twice. It became wobbly, or too loose and wobbly, which might work for someone else, but not me, even when this was a practice project only.

Thanks to Creativebug, at least I know chain stitch, slip stitch, and single crochet (US) now… Phew. Towards the end, my hand was quite sore from twisting the heavy thread and hook so many times, but I still kept going.

The smallest bowl is around 10 cm in diameter, and now houses keys on my entryway table, which white paint was starting to scream quietly from being scratched so brutally by metal keys. Its bottom is one whole t-shirt yarn, and then for accent I used bits of two other yarns in white and greyish blue-navy stripe.

I still have a few balls left from my cutting fest last year, and closely scrutinising other shirts have revealed that two or three more will face the rotary cutter sooner rather than later.

So, what to do with the rest? There’s still the upper portion, from armpits to neck to sleeves, to use. Currently I have a library book borrowed in which various patterns are written for t-shirt yarn, and one idea in it is to place a tennis ball inside a cover of t-shirt material, to create dryer balls. On Pinterest I’ve seen someone make similar out of old socks bundled up, so instead of a tennis ball, all the excess fabric could be bunched up into a ball, then handsewn closed. Supposedly these dryer balls fluff textiles during drying, but I have no such machine so can’t test these.

Are you sold on repurposing textiles like this or in other ways?

SCANDIBEE IN 2016 AND A PIN CUSHION SWAP

To launch a new, exciting year of sewing Scandibee blocks, we kicked off with a pin-cushion swap in December. Eight of us have chosen to continue in 2016, whereas Anne in the Netherlands, Lizzie in Sweden, Nina in England, and Synnøve in Norway decided to focus on other new adventures. In their place we now have Jenny in England, Karen and Maja in Denmark, and Louise in Sweden. Welcome ladies!

Other news from Scandibee is that there are more hives, not just ours anymore! The interest for Ruth’s idea became so huge that she decided to expand, and hence the hashtag for our hive in the new year is #scandibeehive1 although you can check out the main one as well.

Since Instagram improved group messaging, we decided to skip Flickr as a communication platform, because turns out quite a few of us forgot to log on there. Emails and Instagram worked very well in the end of 2015.

But pin cushion, what was that about? In December 2014 we swapped mug rugs, so for this year’s getting-to-know-each-other gift we chose the humble, but very useful pin cushion.

I happened to have Marica as my secret swap partner, which is why my November blocks for her were at tad late. Postage has increased ridiculously in the past year within and in particular out of Finland, so I wanted to catch more birds at once. Of course they increased it even more in February, but we decided to drop the extras, and instead send blocks only this year.

Nina With Freckles - Scandibee 2015 pin cushion swap 1 2016-03-14

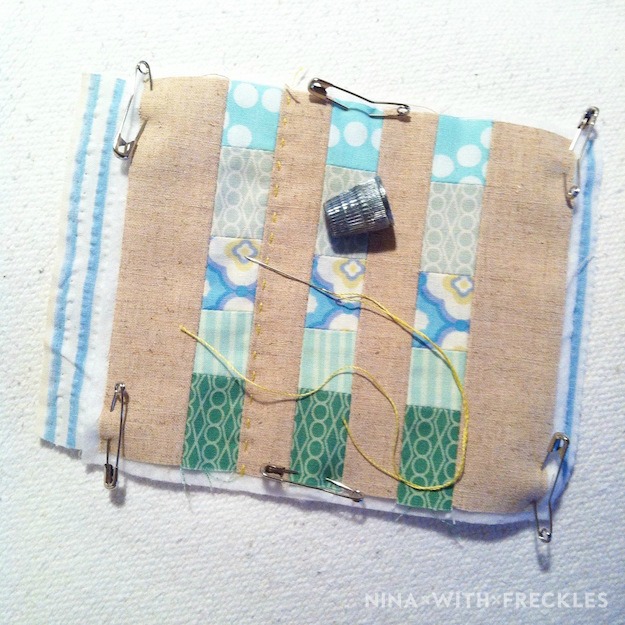
A couple of years ago I made some small, scrappy improv panels, possibly to be used as mug rugs, but never used them. One looked nice enough to work well with Marica’s inspiration mosaic, which included natural linen as background, and so I chopped it up in three parts, cut two strips of linen of the same size, and made the side panels slightly wider. Unfortunately I can’t recall the exact sizes anymore, but I think the strip widths in the middle ended up being 1” wide finished.

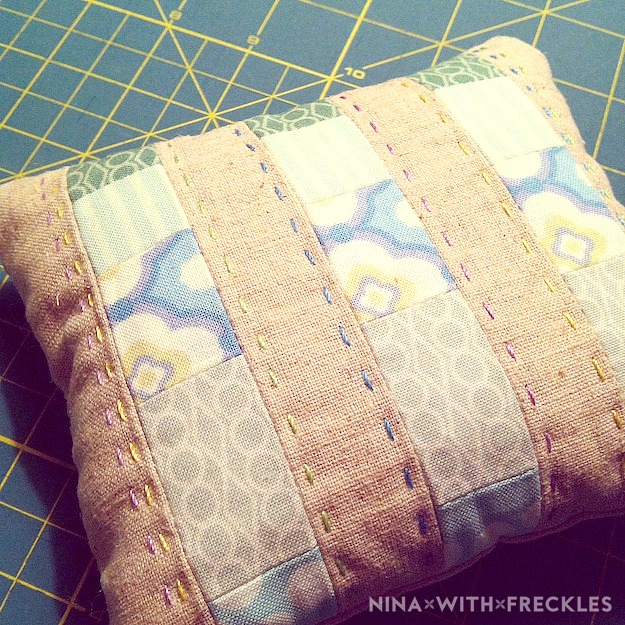
For the backing of the pin-cushion top I used a piece of seersucker that I had in my stash. Since it would face the stuffing, I just needed something to keep the batting in place. The hand quilting I decided to embellish my pin cushion with went through these three layers, after which I placed the pin-cushion bottom and this sandwich right sides together, sewed most of the sides shut with a quarter-inch seam allowance, filled the pin cushion, and hand-sewed the open seam closed.

Nina With Freckles - Scandibee 2015 pin cushion swap 2 2016-03-14

Due to a happy coincidence, my Aurifil 28-weight thread box contained the right colours for this project! I stitched with greenish yellow, light green, light blue, and light violet, whcih all matched perfectly the fabric colours.

Here’s my inspiration mosaic for my own secret swap partner:

Nina With Freckles - Scandibee 2015 pin cushion swap 4 2016-03-14

Clockwise from top left (with permission), Instagram users: 1. @sewgoclimbing, 2. @jeliquilts, 3. @a_craftycleverness, 4. @sewingroomsecrets.

In return, I got this cute, flat pin cushion made by Maja in Copenhagen. With our own postage system in mind, where letters thicker than 20 mm are considered parcels with astronomical fees required, I mentioned my short appliqué pins being in need of a proper home.

Nina With Freckles - Scandibee 2015 pin cushion swap 3 2016-03-14

They are a third or so the length of a normal pin, and I think they sit very well on this modern, graphic design. Thanks once again, Maja!

Have you committed to a bee this year? Or made the contrary decision?

SCANDIBEE DECEMBER BLOCK AND WRAPPING UP 2015

It’s time to present the last Scandibee block of 2015! Our Queen Bee was Hanne in Denmark, and she requested a block called X Marks the Spot by SewCraftyJess (tutorial). The background was to be scrappy low-volume, whereas the X should contain four different fabrics of the same hue as the centre square would be.

I chose pink, because there’s an abundance of it in my stash still. No matter how much I think colours aren’t gendered, some girls seem to believe princesses and pink are the way to go, so what can I do?

Nina With Freckles - Scandibee December 2016-03-12

Since I had quite a few low-volumes in pink, too, I chose those and red for the whole background.

We had agreed to make either one or two blocks of this rather complex block design, and I chose to make only one, partly due to inaccuracy problems. The blocks obviously need to match perfectly one another in size, and this design has a huge number of seams where everything can go completely wrong, so I opted to send only one block to Hanne.

If you’re following our hashtag #Scandibee on Instagram, you can peruse the pretty selection of blocks made for Hanne, and I personally can’t wait to see her finished quilt top!

Have you seen this block design before out in the wild?

As for Scandibee, we wrapped up our first hugely successful year after having spent many an hour at the sewing machine, creating a vast number of projects for each other, whilst trying several new techniques, colour combinations, block designs and more. I’d like to think we’ve also made great internet friends, since few of us knew the others in person, and in fact I haven’t even met any of the ladies in their physical appearance yet, but we hope to do so one day!

QUILTY CALENDARS FEBRUARY AND MARCH

Sometimes I suck so bad, it makes me crylaugh and snort simultaneously. I just glanced at my fridge door and noticed the calendar from January still hanging on it. It’s amazing how our brains can become unresponsive to certain things after a while, and while I have no idea of the cause to make me see it with new eyes again, instead of writing a to do in my calendar, I made the two missing calendars in one go. And I will write a note in it to make April’s calendar to post – before March is completely over.

Here’s the one for February, in case you wish to make retroactive scribbles still:

Nina With Freckles - 2016-02 Quilty Calendar 2016-03-12

Nina With Freckles - Download button 2015-09-16

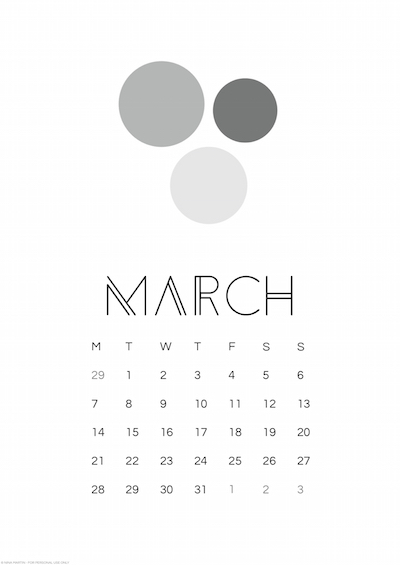
And the one for March:

Nina With Freckles - 2016-03 Quilty Calendar 2016-03-12

Nina With Freckles - Download button 2015-09-16

I hope you enjoy them! Please comment if you find something wrong with the pdf file, and I’ll see if I can fix the problem.

Earlier calendar:

SCANDIBEE NOVEMBER BLOCKS

Moving on to yet another month of Scandibee block sewing, November! Queen Bee this month was Marica in Sweden and she chose for us a star block with low-volume background and a grey star in its centre. We could make it scrappy or go with one fabric only, and since I had grey fabrics with rather scrappy-looking patterns, I decided to use those. The tutorial for the blocks can be found here, at Clover & Violet.

The first edit I made was to enlarge where appropriate, to counteract the smidgen worth of problems I have with my inaccurate presser foot/needle plate combination. It worked very well, since we’re talking about fractions of millimetres here and there, and so in the end I simply had to square up by cutting at tad bit of excess low-volume background. This is something I do with each block I make now for others, if only possible, but needless to say, the extra calculations are a bit mind-numbing somehow. That makes me appreciate sewing complete projects, or sewing for myself, so much more!

But on to Marica’s star blocks. Here’s my first one with a lighter star:

Nina With Freckles - Scandibee November 1

As for star patterns in general, this is one of the more unusual ones, and for that I liked working with it a great deal. I can’t wait to see what Marica’s quilt will end up looking!

Nina With Freckles - Scandibee November 2

For some mysterious reason, when first starting my Scandibee journey, I was hesitant in regards to low-volume fabrics, but now I love the effect. Although I like all of them when combined, I think my most liked version is when the pattern is greyscale only, such as the light-grey patterns on white background above, or restrictedly, black on white as well.

I have some fabrics that could be categorised as low-volume due to having a stark white background, but the black pattern is so large, or thick, or both that it looks like it doesn’t blend in well with other low-volumes.

Have you jumped on the low-volume fanwagon yet? Are you going as far as to replace solids (solid white) as background fabric for your projects?

SCANDIBEE OCTOBER BLOCKS

Hey woohoo, one whole month fast forward in one day only. It’s a miracle! Hrm, yes, it seems like the increasing length of day and the approaching Spring (can’t feel it yet, but we’re getting closer with less snow at least) makes me a bit giddy.

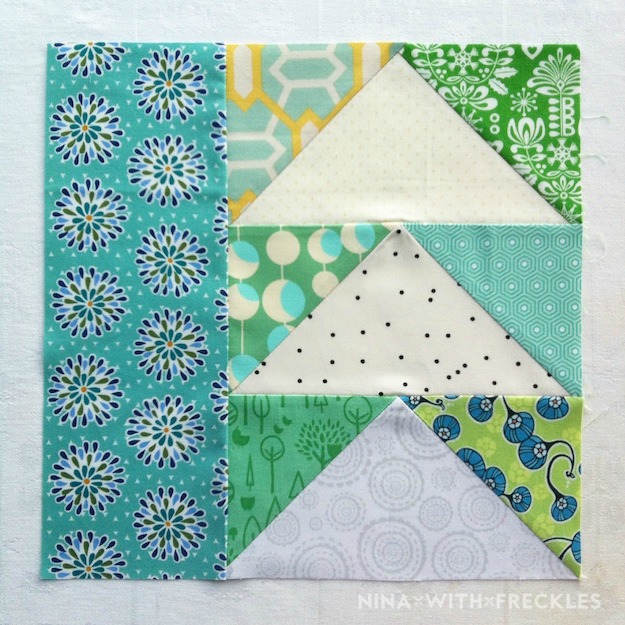
So, the Scandibee October blocks were for Belinda in Norway, and they incorporated flying geese, which are on my mind now, in particular as Anna Maria Horner has an absolutely gorgeous class on Creativebug. Belinda requested scrappy flying geese with low-volume birds, one-hued backgrounds, and as a final punch, a side panel with large motifs.

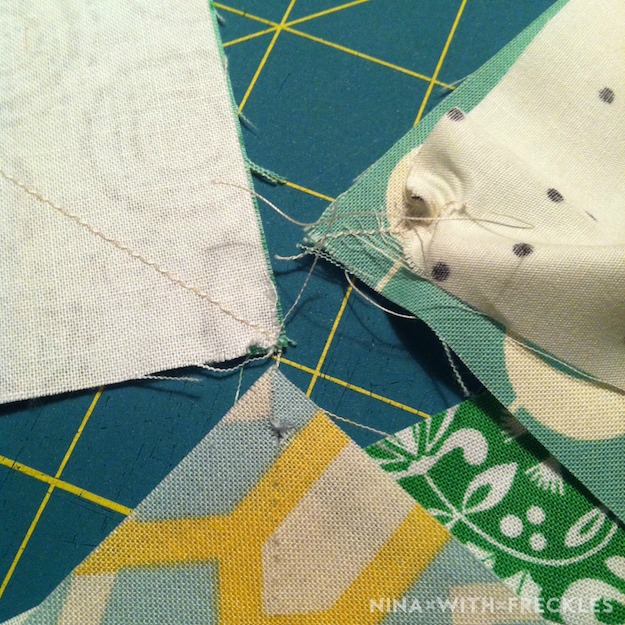
My sewing machine is a topic I’d rather not talk that much about anymore, so a photo will suffice. It does test my patience, but I suppose that’s what I’m supposed to be dealing with :)

Nina With Freckles - Scandibee October 1 2016-03-11

There was extensive troubleshooting on Instagram after I posted the same photo there, and currently I’m using leaders as often as possible. Leftover selvedges are perfect when cut up into small strips, by the way.

Nina With Freckles - Scandibee October 2 2016-03-11

Tadaah, that’s much better.

Nina With Freckles - Scandibee October 3 2016-03-11

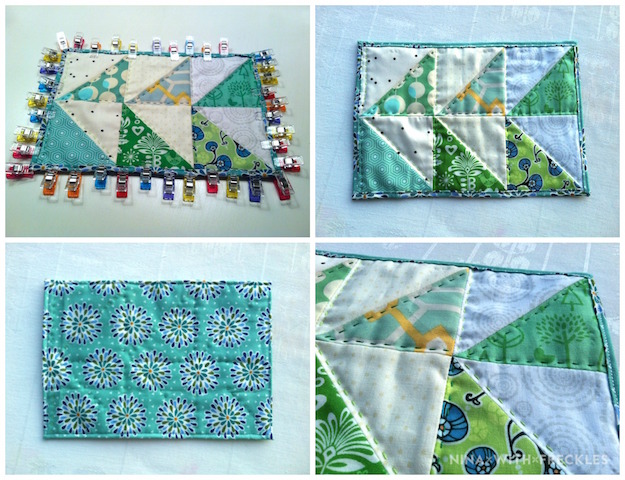
Indeed it is! As for the leftover half-square triangles of the first block, I decided to use them in a mug rug.

Nina With Freckles - Scandibee October 4 2016-03-11

For some unknown reason I had cut the backing quite a bit larger, which gave me the idea to try a new binding technique. Oh, and what’s that hand stitching? Yes! It’s my first hand quilting! I had so much fun, and it was made possible courtesy of Aurifil’s lovely 28-weight box that I received a couple of years ago, but hadn’t had a chance to take for a test spin yet. I adore the texture, and in fact the Queen of hand quilting, Sarah Fielke, prefers this thread over Perle 8 cotton. Supposedly this behaves better when being pulled through layers over and over again.

Nina With Freckles - Scandibee October 5 2016-03-11

There was a bit too little of the backing despite my initial thought, but machine stitching it in place worked well enough. Due to its purpose as a mug rug, and the fact that the geese points with hand quilting were where they were, I wanted a very narrow binding anyway. As for the technique itself, I think I’ll stick to a separate binding in the future, but I’m very happy I have tried this at least once!

The HSTs from the second block are unused still :) Oh the possibilities…

The October blocks were fantastic and they certainly get done quickly, in case you’re in need of a quick block for some project. I tried to access the website with the tutorial we used, but Firefox claims it’s been reported as an attack site, so I’m not going to put a link here. The block finishes at 12.5”x12.5”, though, in case you want to do your own math. The side panel is 12.5”x4.5” to get you started.

The range of colours that Belinda has received is fantastic, so check out #Scandibee on Instagram if you want to keep track of the quilt!

SCANDIBEE SEPTEMBER BLOCKS

There’s something curious about blogging in March 2016 about September 2015 blocks, but I’ll try just for the heck of it :D Granted, they were sent to Annika in Sweden in December only, but still…

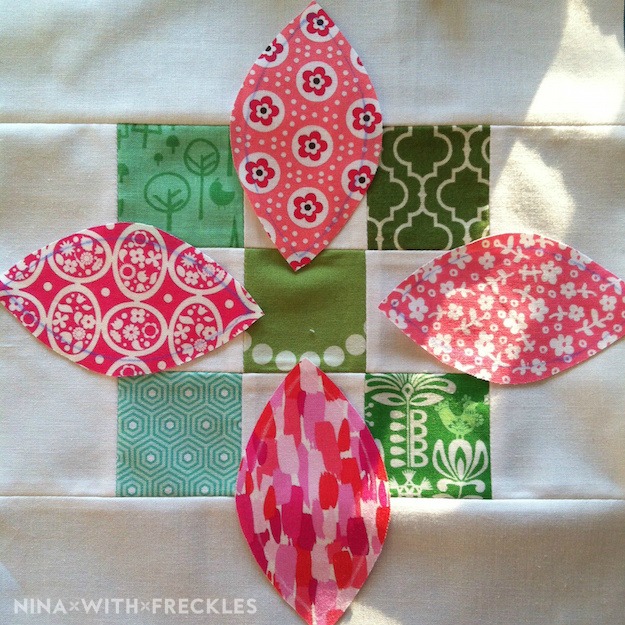
Annika requested two blocks, which finished at 10.5”x10.5”, and while the background was quick and easy, the petals in pink became my nemesis of sort. Why, you ask? Needle turn appliqué. Sewing by hand. Oh dear. Before we continue, let me assure you that I’m quite eager to try English paper piecing at some point, so the story doesn’t end in blood.

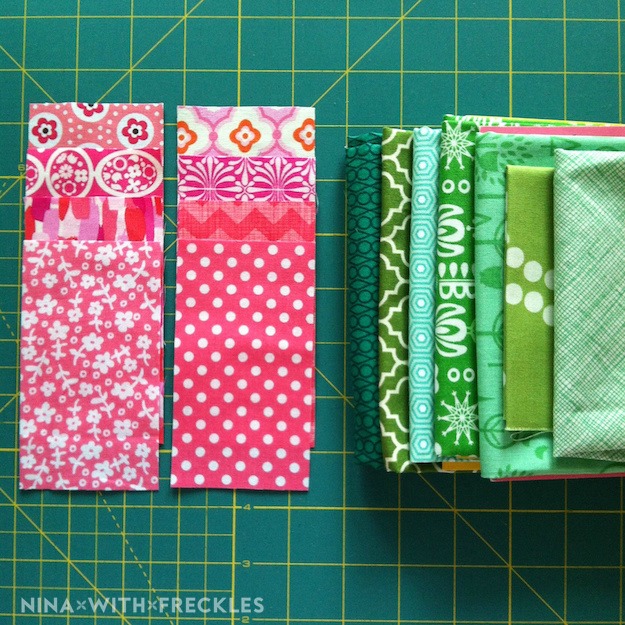
She also had wishes in regards to fabric colours. The background was supposed to be a mix of white and green, whereas four petals, starting from a 2”x4” rectangle, were to be pink. All scrappy as per our general rules.

Nina With Freckles - Scandibee September 1 2016-03-10

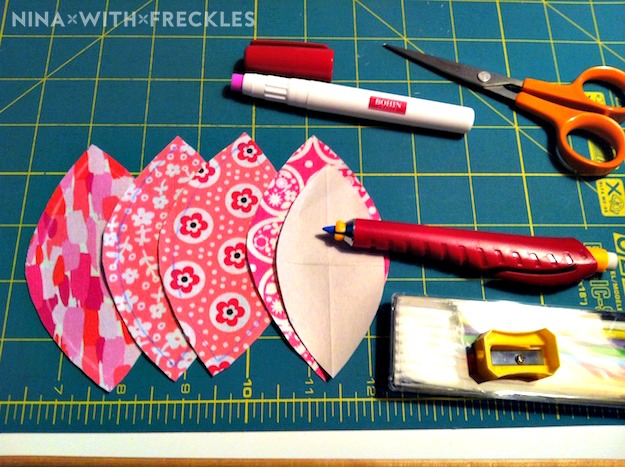
To fit the background (you’ll see below), Annika asked we draw our own petal templates, and I decided to make mine as symmetrical as possible. I folded a piece of paper first in half, then another time in half. On one of the quadrants I drew a gentle curve along which I cut, then used the cut edge to draw on the rest of the quadrants, whilst folding and opening up the paper as needed. You can see my template here:

Nina With Freckles - Scandibee September 2 2016-03-10

There’s also two thirds of a Bohin kit bought via Massdrop. One chalk pencil with sharpener is for thin chalk (white on top, colours below in the box), another not showed is for thick chalk, and the third is a glue stick. I’m very pleased with the quality of these products! (No, I don’t get anything for saying this.)

And here’s my first block. For some reason I had forgotten my Craftsy class in which Sarah Fielke teaches needle turn appliqué, but using that knowledge all of a sudden made my mental block get unstuck. I won’t say it is easy nor fast to learn this technique, as the pieces are a bit fiddly to begin with, but gluing down each petal along its centre helped a great deal.

Nina With Freckles - Scandibee September 3 2016-03-10

Here’s a process photo of the second block, which petals I happened to draw first though. You might see the thin white chalk line on the bottom petal, and working with it convinced me that the violet line for the rest of them was a smart choice. While it is reasonably visible in its flat state, when turning the seam allowance the colour disappears almost completely against the white background.

Nina With Freckles - Scandibee September 4 2016-03-10

In case you never heard of needle turn appliqué before, perhaps it’s beginning to sound less tricky already? The point is to finger press along a line, which will work as the seam line, and once you sew, aka turn the seam allowance with the needle, the quarter-inch worth of fabric will get tucked under.

My bee members did various versions of hand appliqué, but based on what I saw – cutting up two layers and folding inside out, or using aluminium foil to press down the seam allowances – I still think this technique seems the most straight forward as long as you know what you’re doing. I kind of detest hand sewing, but found a rhythm halfway through the first petal, believe it or not!

Nina With Freckles - Scandibee September 5 2016-03-10

The lighting in winter evening conditions is dreadful once again, but such is it. As for my two blocks for Annika, once they finally were sent to her, I was pretty darn proud of them! The only thing I’d do differently is to have a better needle for the purpose. Sarah Fielke uses long, thin needles and I need to hunt them down, because the crystal ball tells me there will be more appliqué in my future.

The mind works in mysterious ways sometimes, but if I ever doubted my Craftsy classes, this particular case shows just how important they are to me. I like learning at my own pace, and with the chance to rewatch something I found difficult, or simply didn’t catch the first time when the phone rang, and so I will keep being a happy occasional customer.

STILL HERE!

Yes, I’m here, still here! Technology didn’t agree with me for a while, as first my Canon Pixma printer started showing an error code, which turned out to be its death sentence, and then a few days later some impossibly appalling individual chose my IP address for a DoS attack. Such people should, well, I don’t wish nice things for them.

My internet got cut off until I had waded through all devices and their settings, after which I lost for a while all joy to contribute to the very place that someone had found me through, then exploited like that. So no blog updates to post yet, but I’ll get to it once my sewing deadlines have been met. Happy weekend!

QUILTY CALENDAR – A MONTHLY FREEBIE IN 2016

Hello everyone, it’s been a while since I posted my last update on Tokyo Subway Map QAL and I finally have the fabric. I also received the Moleskine about two weeks ago, but as I was printing some things to put into it, I ran out of glue tape. The grocery stores didn’t carry it, but an office supplies store wasn’t immediately on my path, so it’s taken longer than expected to get on a roll with the new Bullet Journal gone GTD. There are finally some photos I want to post, but that will wait until next week.

In the meantime, the little thank you I have promised to share! You’ll find the download button at the end of the post, and the file is uploaded to WordPress directly, so no worries about weird external link sources.

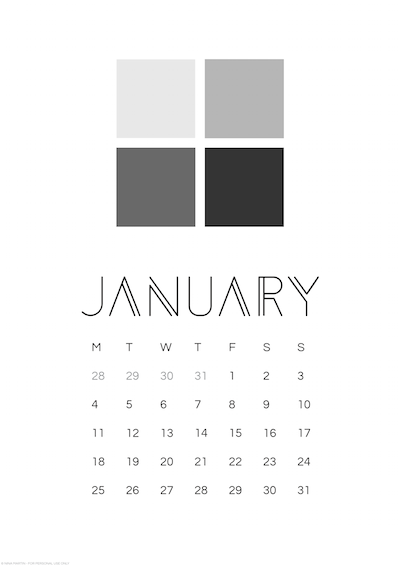
Nina With Freckles - 2016-01 Quilty Calendar 2016-01-17

I’ve decided to post a free printable Quilty Calendar each month this year, and that is the one for January. Mine is already on the fridge, so printing works on Mac at least. The format is A4 and make sure to print at 100% even if your paper is US letter.

Why “quilty”? Well, I like graphic shapes, and the greyscale was chosen to accommodate also those with black-and-white printing as only option at home. Plus it is nice with a subdued colour palette from time to time.

If you’re curious about the typography, the month is written in Anders by Tom Anders Watkins, who happens to be half-Finnish by the way. Anders is a free font, as is Questrial by Admix Designs, the one used in the calendar portion. As usual, should you install them for your own use, make sure to read the licences, which in particular on Behance vary quite a bit. A safe choice is FontSquirrel, the source of Questrial linked above, with their free fonts for commercial use.

Enjoy the calendar and please respect the copyright! Refer your friends to my blog and I’m very happy. 2016 is go!

Nina With Freckles - Download button 2015-09-16

WELCOME 2016!

I wish 2016 welcome and hope everyone will have great experiences in the new year! This is the time of year when I reflect more than usual over priorities, hopes and dreams, concrete projects and life in general.

Nina With Freckles - New Year 2016 2016-01-03

All I can say about 2015 in retrospect is that I’m rather relieved we’re done with it. In several ways it was a challenging time, some core areas of my life were (and still are for that matter) stuck in a sense, leaving me feeling like I have no say in the important matters.

That isn’t true, of course, and we have more power than we at times care to admit over our lives, both in regards to who we invite to share our daily lives and where our feet take us. I can’t but bring up the paradox of us having a choice in most things, but those choices always coming with their own consequences.

A lot of the time, our perceived life experience also depends on the perspective that we choose to view it in, and I have so many things to be grateful for. What I’m exhausted from and unbelievably tired of, however, is being unemployed. I desperately want to control daily life in regards to my academic progress yet I can’t. Someone else has decided that research will be down-prioritised and that’s that. What I’m saying is, as an example, I had planned to buy more of the white background fabric for my Tokyo Subway Map Quilt, but when time came to place an order, something actually important came up, and so I had to postpone it. To the outside it might have looked like craptastically bad planning, but life happened, and I also had to eat and pay my bills. You know? Like I said, I’m grateful for many a thing in my life, but money isn’t too silly an invention.

Since funding for scientific research is down in the basement, I’m taking actions to do other things. Currently I have no announcements in that department, but you could wish me luck, as I could use good wishes in the next six months or so. Turning a chapter, or rather a Significant Page in the yearly calendar, has meant that I’ve also been thinking about leisure and business. In the leisure area, I’m naturally including most of my quilting projects, and while participating in swaps and hosting quilt-alongs is great fun, this year I need to do more for me, invest time and energy in cranking out my first patterns, cutting out unnecessary challenges, unnecessary blogging, and more.

By unnecessary blogging I mean that I want to implement the plan I’ve mentioned last year. Which brings me on to my chosen word for 2016. I’ve had a word a couple of years now, but this is the first time I want to share it in public. This year it is ‘focus’, which includes elements of earlier years, but in a sense crystallises what is the most important aspect to keep in mind right now. Focus includes clarity, discipline, following through, and more.

Yesterday I read Christa Quilts’s blog post on being a quilter who blogs, not the other way round, and I was nodding in agreement. To me it means to define the core, then add only the bare minimum of other elements to create a warm atmosphere in one’s online corner. The challenge for me will be to find an acceptable balance between keeping things that I’ve learned to myself, and sharing them with you. I have discovered I love teaching, when I can forget about being self-conscious, but that means there’s less time for sewing, about which I’m no happy camper at all – because love teaching…

The amusing part about it is that I’m a beginner still, but on the other hand I become a micro-scale expert each time I’m tackling a new tiny bit of the quiltoverse, and that’s the stuff I want to share. And oh how I love all those weird small nuggets of information, too, which can actually make it or break it, quite literally in the case of incorrect thread weight to mention one example.

To me, focus also means a clear approach to health and leisure, the two elements that I think make up ‘personal balance’. Speaking of balance, I don’t agree with the concept of ‘work/life balance’ at all, because work is part of life, and in many cases it implies that one dislikes one’s work, and only lives life outside of all the hours spent at work. That doesn’t make any sense to me. I know that all of us can’t love with pure passion what we do for a living every single day, but still, create ‘balance in life’ and include all elements in that expression should be realistic. No?

Another funny thing is ‘in real life’ as opposed to ‘online.’ Do you feel like your online existence isn’t real, isn’t a part of your daily life, isn’t as valuable? I think it’s nonsense, as I care a great deal about how I interact with people (and feel actual shame when I perceive that I’ve let others down) and also about my contributions to the community. Writing “I want to do more for me” made me feel like I should explain that it isn’t only sewing for me, but adding things to the community that I think someone else might enjoy, too, and that is how funny it is yet how deep it goes.

So yeah, focus it is. I have already started (once again… *grins* not throwing in the towel, though; never!) up-prioritising my health, including sleeping well (enough and regularly), increasing exercise outdoors, yoga in the mornings at home, meditation in the evenings before going to bed, drinking enough water (I tend to forget about it when it is cool or cold outside), and checking what and how much I eat. All these efforts increase and decrease during the course of a year, a bit like a sinus curve, but the desire is there to keep improving, or remain in balance. If nothing else, then my stress-related migraine should be less likely to show it’s abominable head.

This winter I haven’t had a depression like I did last year, but it sure has been gloomy. Only in the past few days have we seen any sort of snow (yay! and it’s getting much, much colder, too!), and when there is nothing white on the ground at night, we have to create an impression of being awake and feeling energetic in other ways, such as what I mentioned in the above paragraph. Even though we don’t go to sleep at 15.15 in the afternoon, that is when the day ends around this time of year, the sun goes down and the night begins after fewer than six hours of daylight. Oftentimes the sky remains grey, but I’m a bit nuts in that I love this place for all that it is, and don’t feel like moving from here either, at least for now. Solstice was a great day as well, and even though daylight increases by only a minute a day still, I feel like we are going in the right direction again :)

Apart from ‘focus’, in 2016 I wish to recall “Done is better than perfect”, “Show, don’t tell”, and my own quote “Perfectionists exist, perfection doesn’t.” I have a new Moleskine on its way to me as we speak, so stay tuned for the latest twist and turns in the saga of the Bullet Journal tweaked to fit GTD! I might have a goodie in store for you, too, as a thank you for sticking with me through my silent times last year :*